Configure payroll templates

Tutorial: Salary templates simplify payroll processing by allowing a single template to be created and reused for multiple employees. This reduces manual effort and minimizes the risk of errors.

(Explained using the monthly salary as an example)

  1. Base template and inheritance principle
  2. Edit base template
  3. Salary type logic
  4. Add salary types
  5. Set insurances
  6. Add text templates
Screenshot of a salary template

1. Base Template and Inheritance Principle

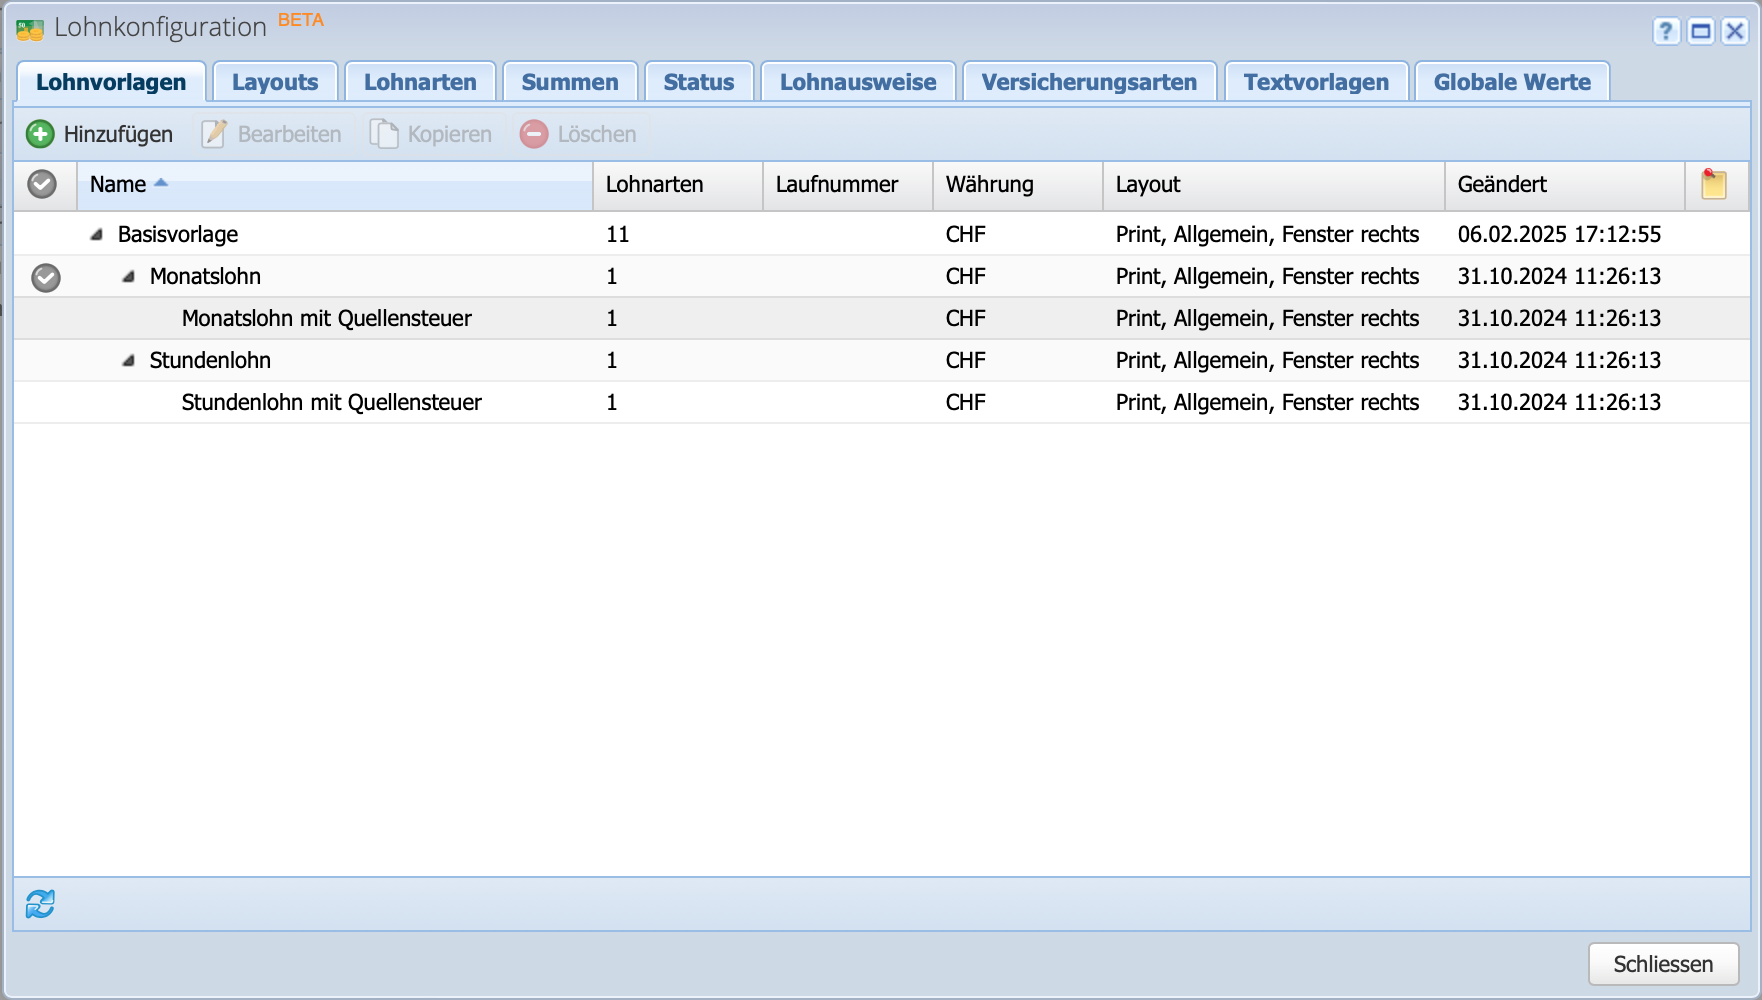
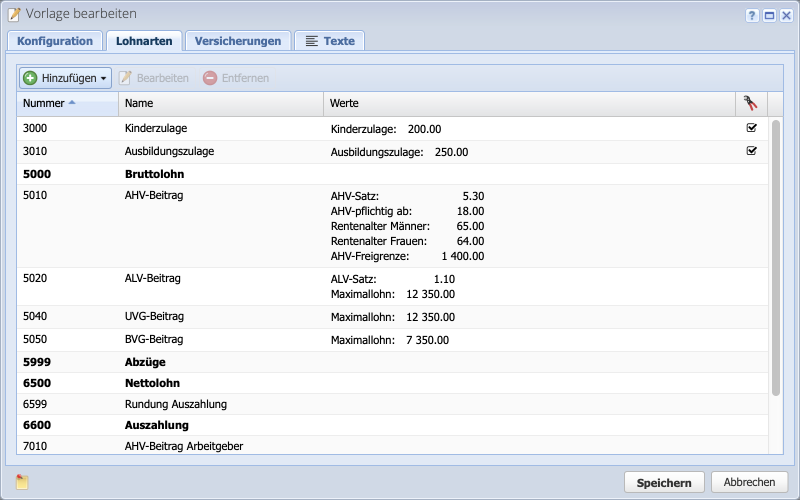
Open the payroll configuration via Settings Payroll Configuration (or directly under Payroll via More Configuration). In the first tab Salary Templates, the default templates are displayed.

Salary templates follow an inheritance principle. Indented templates in the tree automatically inherit from the parent template. For example, a basic setting such as an insurance can be defined in the Base Template, making it apply to all subordinate templates. If there is a specific insurance that only applies to hourly salaries, it can be overridden in the “Hourly Salary” template.

There can be multiple base templates (also under different names).

Screenshot of the payroll configuration with the salary templates

2. Edit Base Template

Select a salary template and click Edit to open the dialog. Since the base template acts as a master template, it logically does not inherit from another salary template. For the Monthly Salary and Hourly Salary templates, the base template is set by default.

In addition to the template name (multilingual), the following settings can be configured here, which will apply to all inheriting salary templates:

  • Sequence number
  • Currency
  • Payroll statement layout
  • Sender

You can also set the payroll statement date (20th) and the payment date (25th) here. These can be customized individually.

Screenshot of the configuration tab of a salary template

3. Salary Types

Next, go to the Salary Types tab. Salary types are sorted by their number. Accordingly, they appear in this order on the payroll statements.

The Values column displays the amounts or percentages prefilled for each salary type. These can be adjusted via the Edit option.

In the last Knippex column, a check mark indicates values that are only preconfigured. Preconfigured salary types do not automatically appear on the payroll statement; they are used to define amounts or rates. The salary type must then be manually added to the payroll statement.

Screen shot of the salary types tab, in which the salary types are added, removed or edited.

4. Add Salary Types

It makes sense to include frequently used salary types directly in the salary template — such as additional insurances like DII (daily illness insurance) or expenses.

These salary types will then appear automatically (in grey, as they are still empty) on the payroll statement and are only filled in when the payroll is created or edited, and the salary type is to be paid out.

Use Add to include any allowances or deductions in the salary template.

Screenshot of the salary types tab with open dropdown for adding salary types

5. Set Insurances

If all employees in the company are insured with the same provider, it makes sense to enter the insurances in the basic template. If, for example, monthly and hourly employees have different insurances, this can be defined in the Monthly Salary and Hourly Salary templates.

In the Insurances tab, you can select the respective insurance or contract for each insurance type (OASI, OPA, AIA, etc.).

Screenshot of the insurance tab of the salary template, where the various insurances are set

6. Save Text Templates

In the Texts tab, you can define templates for accompanying texts related to payroll statements.

This includes the texts on the payroll statement (top and bottom), the email subject, the email body, and the message included with the payment order (pain.001).

Don't forget to click Save before creating payroll statements.

Screenshot of the text template tab when editing the salary template, where standard texts are stored.