Maria Gemüse AG delivers vegetable baskets to customers on a subscription basis. Orders from customers are either planned in advance or placed spontaneously. In order to always have a good overview, the process is set up once and then always carried out in the same way.
Please enter a search term.
Error ~ No results could be loaded.
Partial delivery with monthly invoice
Tutorial: An individual workflow can be created with additional fields and placeholders in the text. For example, a delivery bill for partial deliveries.
Content
- Enter items in the inventory
- Create additional fields for delivery data and information
- Create delivery bill and enter orders
- Enter delivery data
- Preview the delivery note
- Create monthly invoice
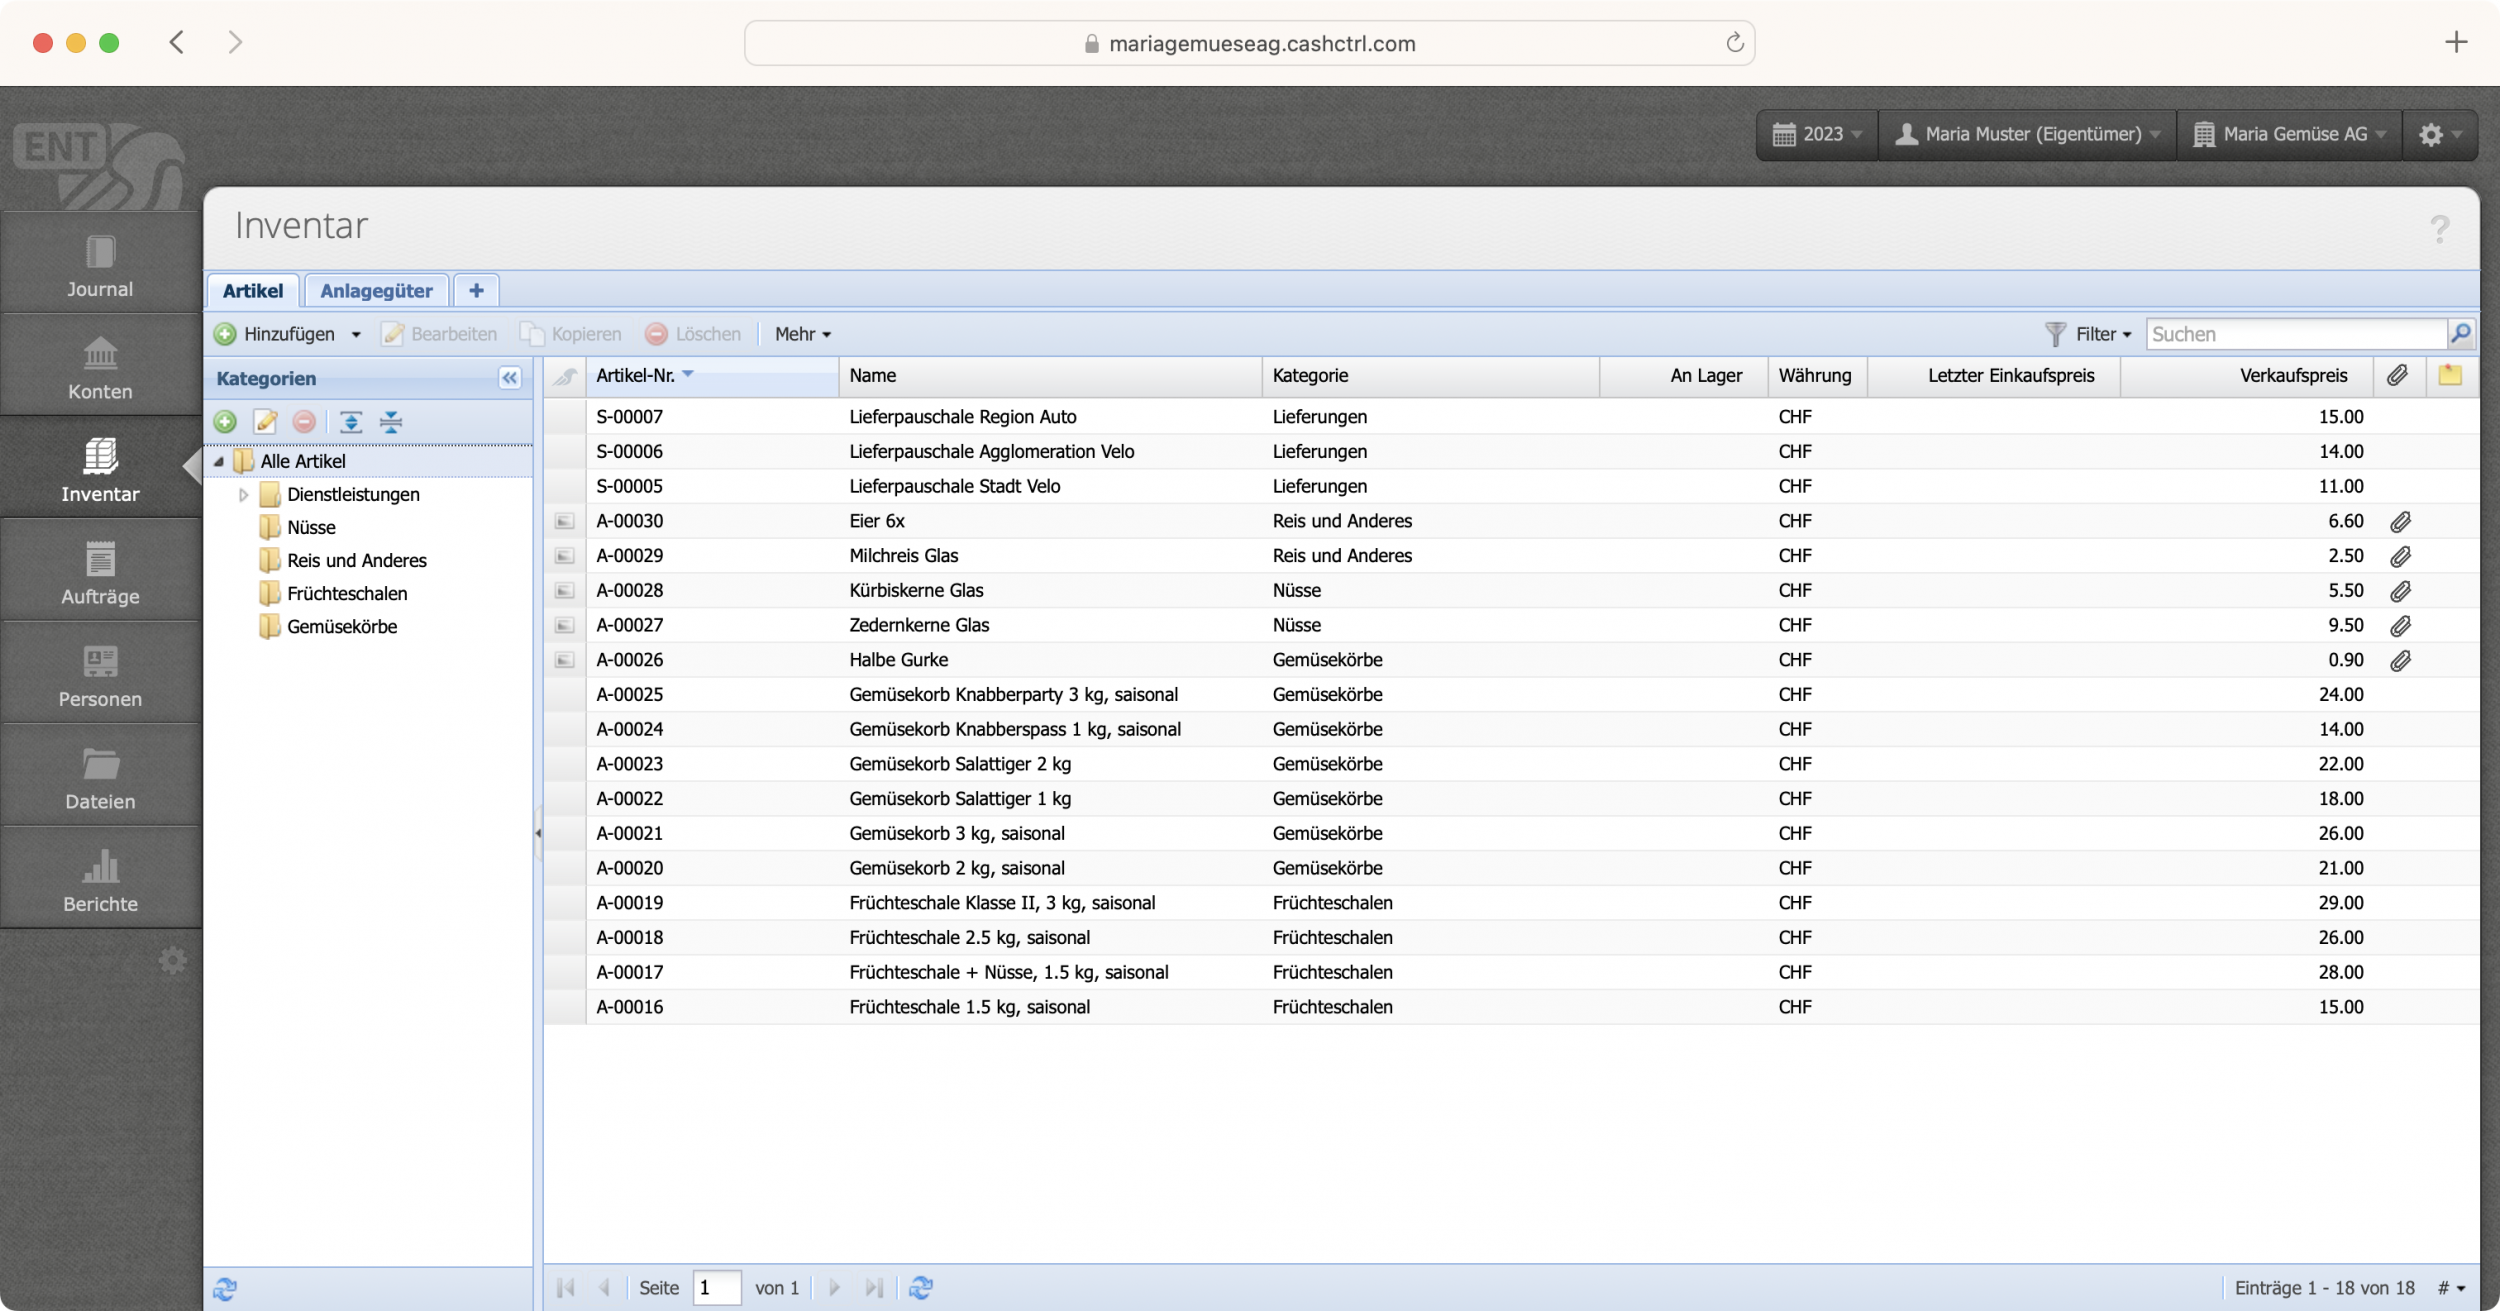
1. Enter article in the inventory
It is recommended to store all articles in the inventory. This way you create an optimal basis for meaningful evaluations. For the example, the assortment was divided into vegetable and fruit basket categories. Once all articles have been entered, the document can be created.
2. Create custom fields for delivery data and information
The custom fields are now created via Settings Additional fields Orders. Maria Gemüse AG would like to make four deliveries per month.
We therefore create four date fields and assign them to the "Delivery data" tab. The tabs are only visible when a new delivery note is created and are used to organize custom fields.
Note the variables (e.g. $customField12), these will be used as placeholders in the text later on.

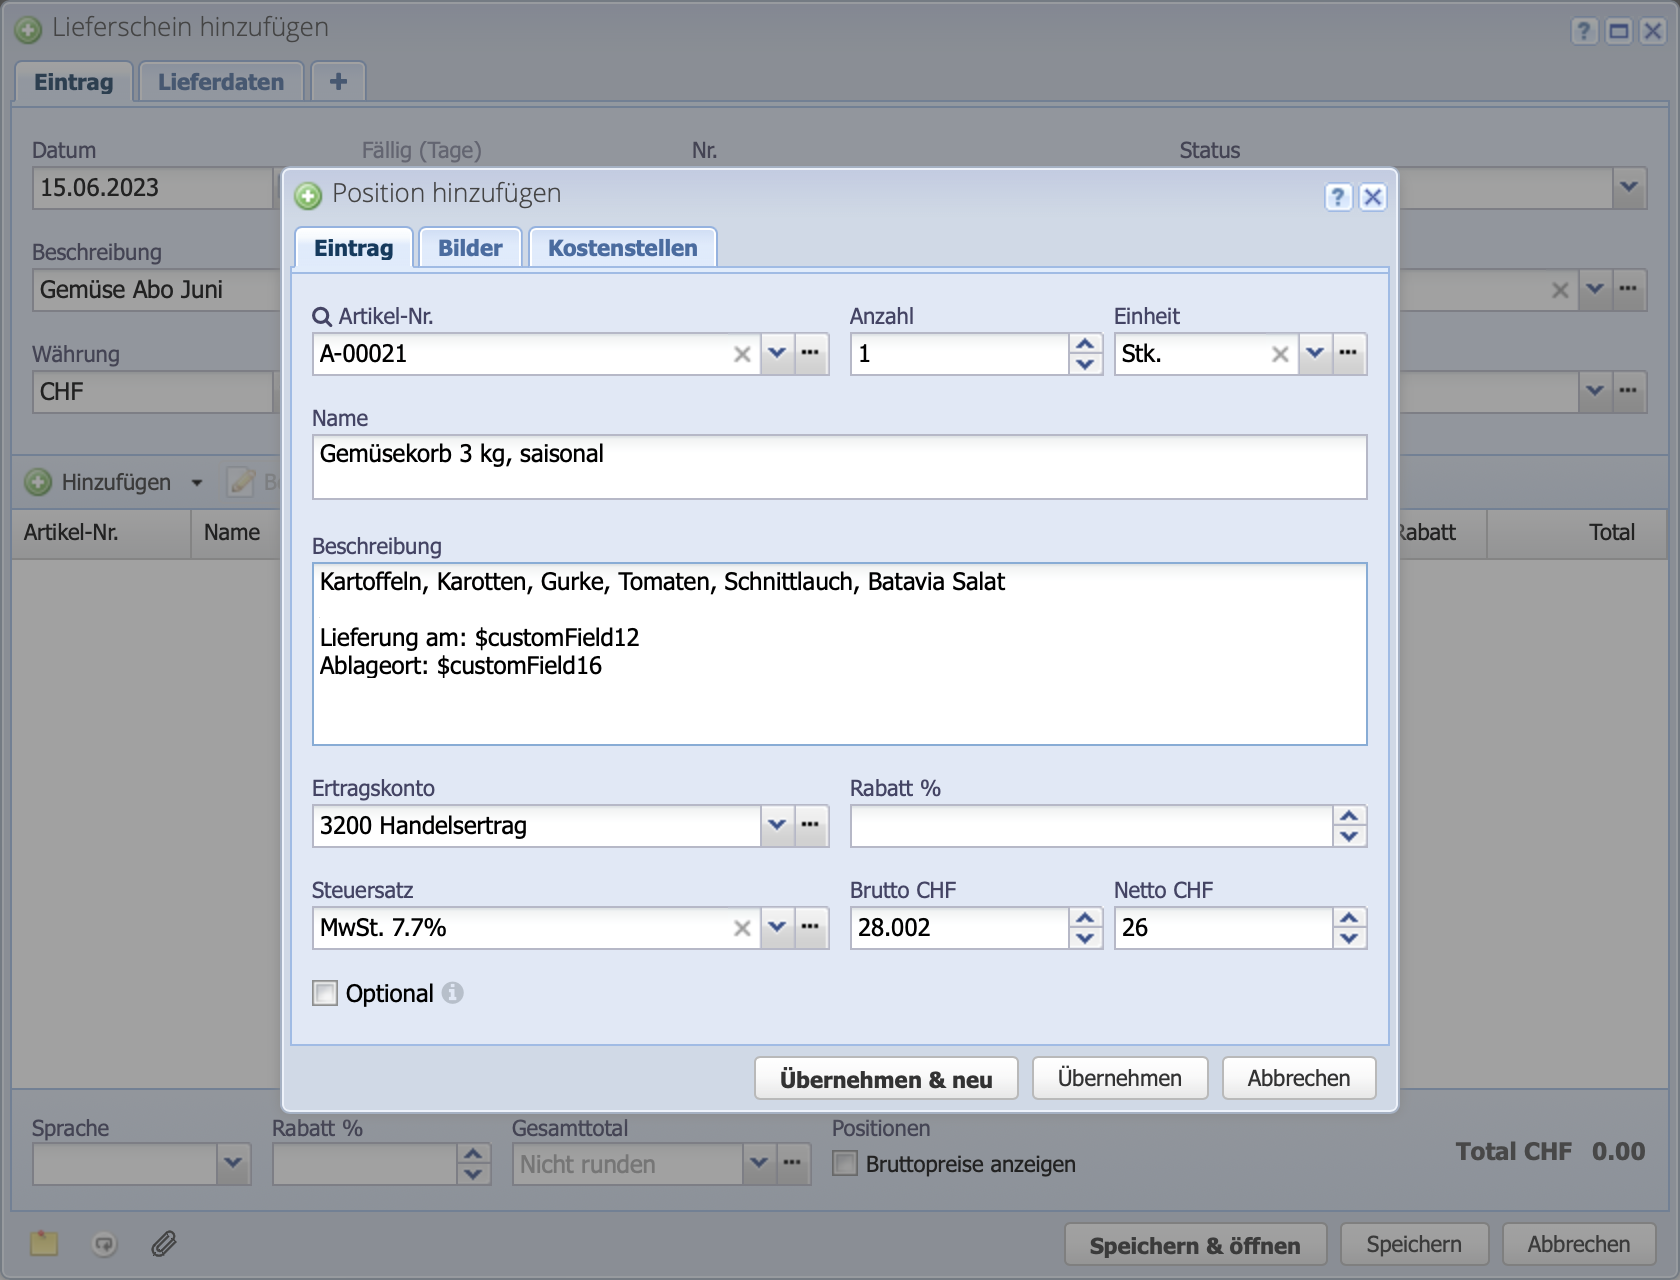
3. Create delivery note and enter orders
The delivery note can now be created and filled with positions. The items (in this case a vegetable basket) are selected from the inventory and provided with the additional information.
The variables can now be used in the description field for the positions. Variables are automatically adjusted, while all other text remains the same.
Each position represents a delivery on a different day.
Delivery on: $customField12 (delivery date 1, 2, etc.)
Storage location: $customField16 (placement of the goods)
There is currently no direct selection option for variables at this point, but this will be expanded in the future. The variable must now be looked up in Settings Additional fields Orders.
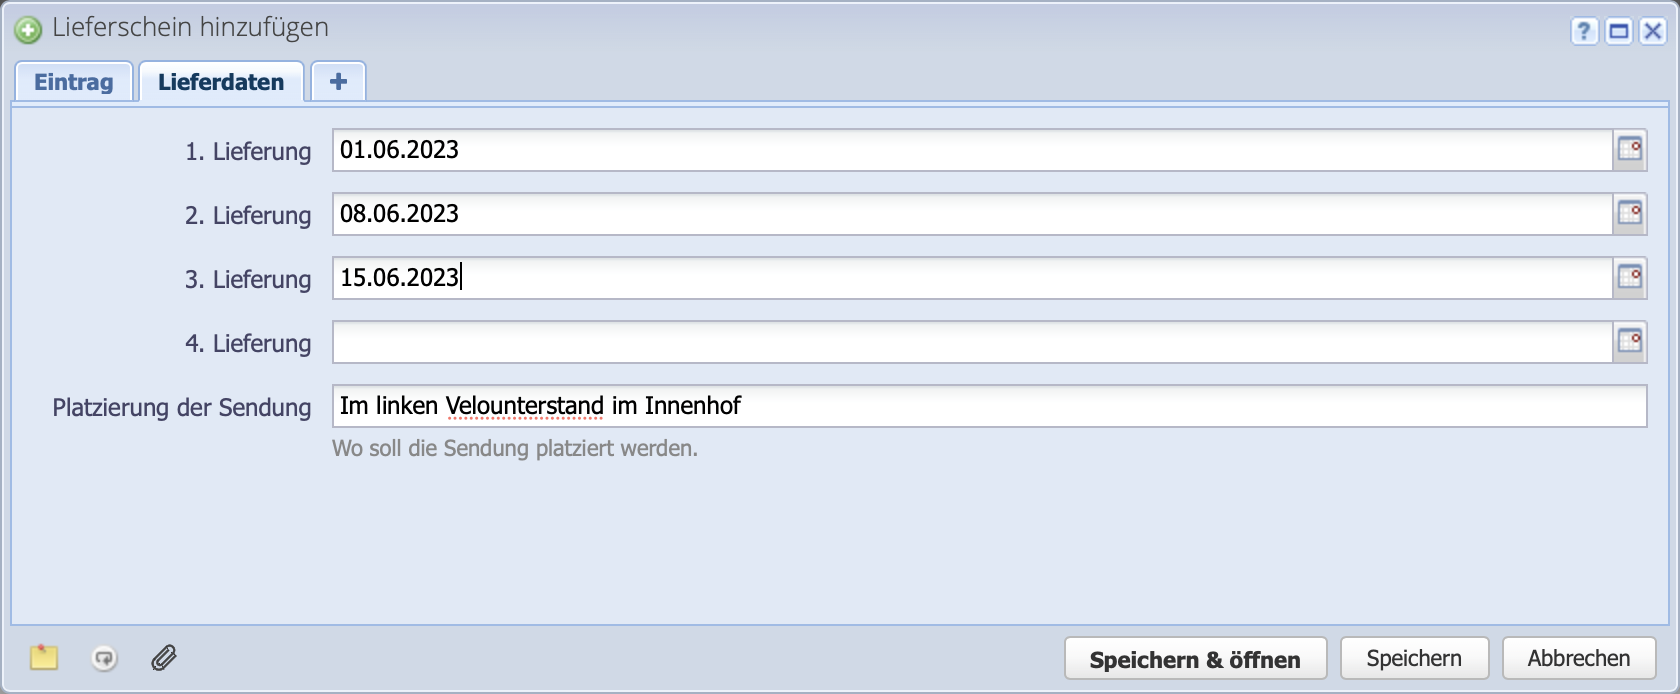
4. Enter delivery data
The delivery data for all planned deliveries can be entered in the "Deliveries" tab created earlier. If the data is created using date fields and not entered manually in the text, the susceptibility to errors due to typing and copying errors can be minimized.
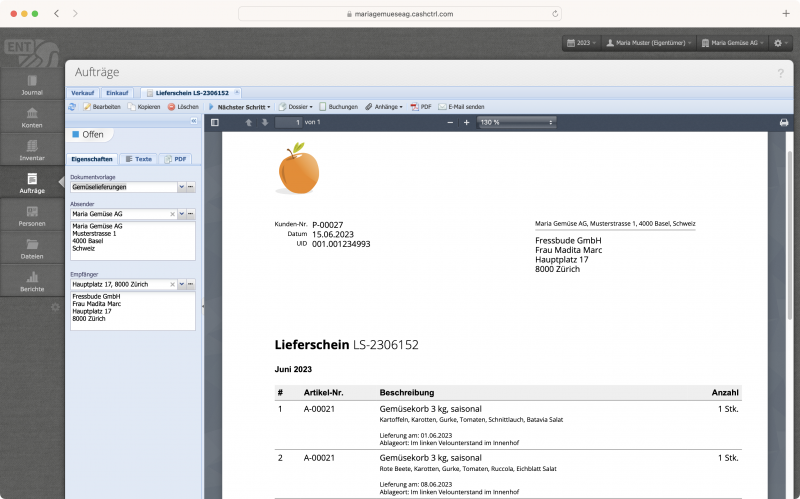
5. Preview of the delivery note
The document preview is generated with Save & Open. The delivery note now provides an overview of all orders in June. The positions do not have to be created in advance; it is also possible to add them on an ongoing basis, which is useful for irregular deliveries, for example.

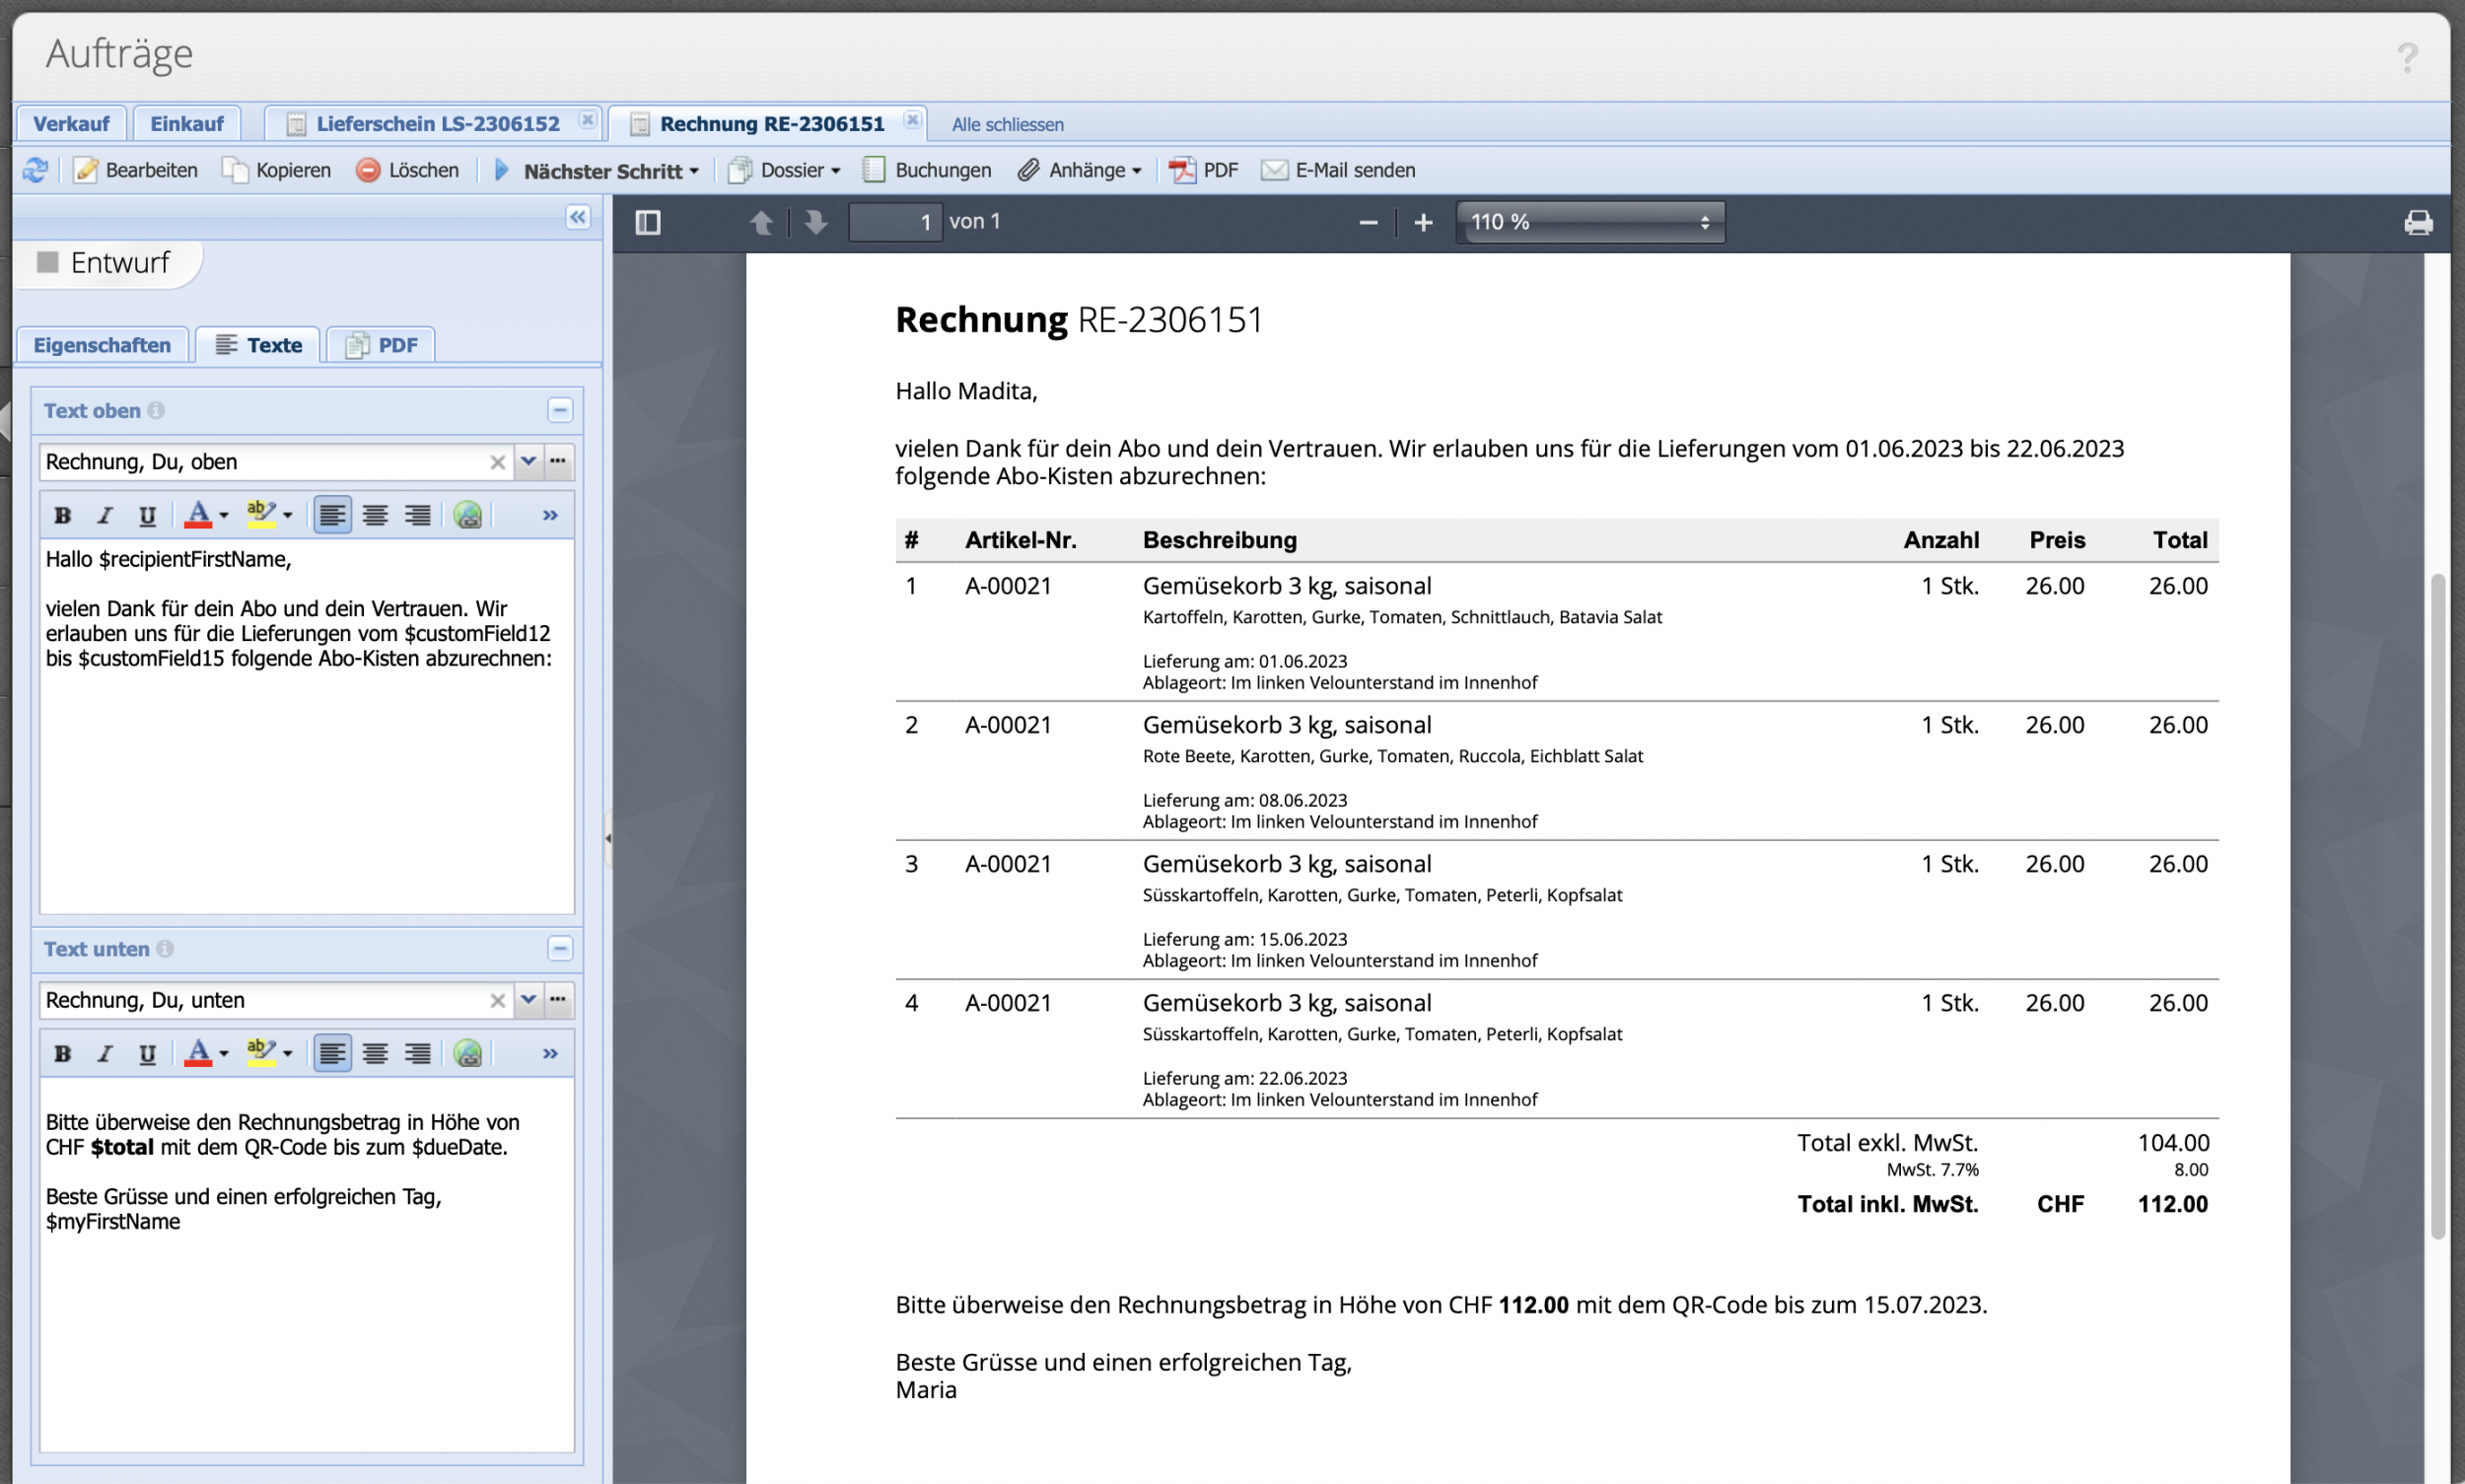
6. Create monthly invoice
Once all deliveries have been made and created on the delivery note, the invoice document can be created with Next step invoice. The edit dialog opens, where the invoice can be supplemented or changed.
Click Save & Open to open the document preview. A greeting text can be selected from the text templates in the Texts tab on the left and the invoice can be sent directly to the customer by send e-mail. The accounting has already been completed.