Create new user and assign roles

Tutorial: Create new users and invite them directly by mail. Create new roles and assign them to the users.

Content 

  1. Create role
  2. Configure role
  3. Logged in view
  4. Invite users and assign role
  5. Invitation email with credentials
  6. Good to know
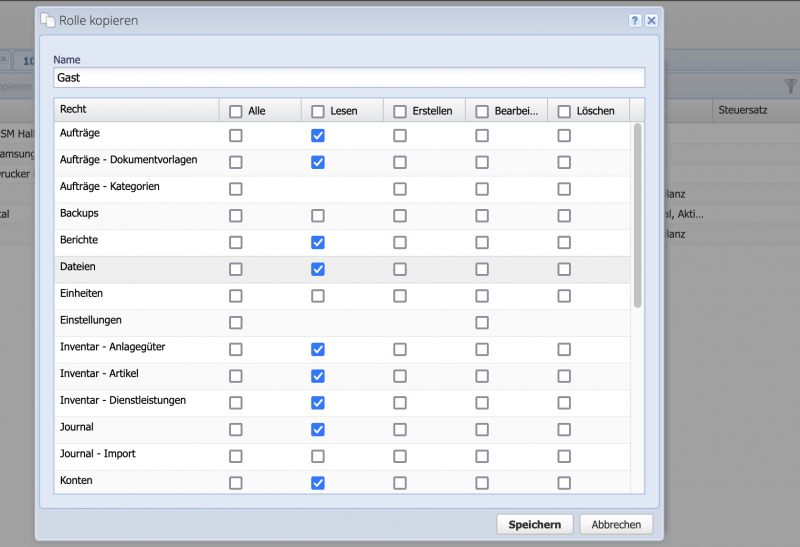
Screenshot dialog settings of a user role in CashCtrl

1. Create role

A role for inventory management is to be created. The person only needs authorization to enter and change items.
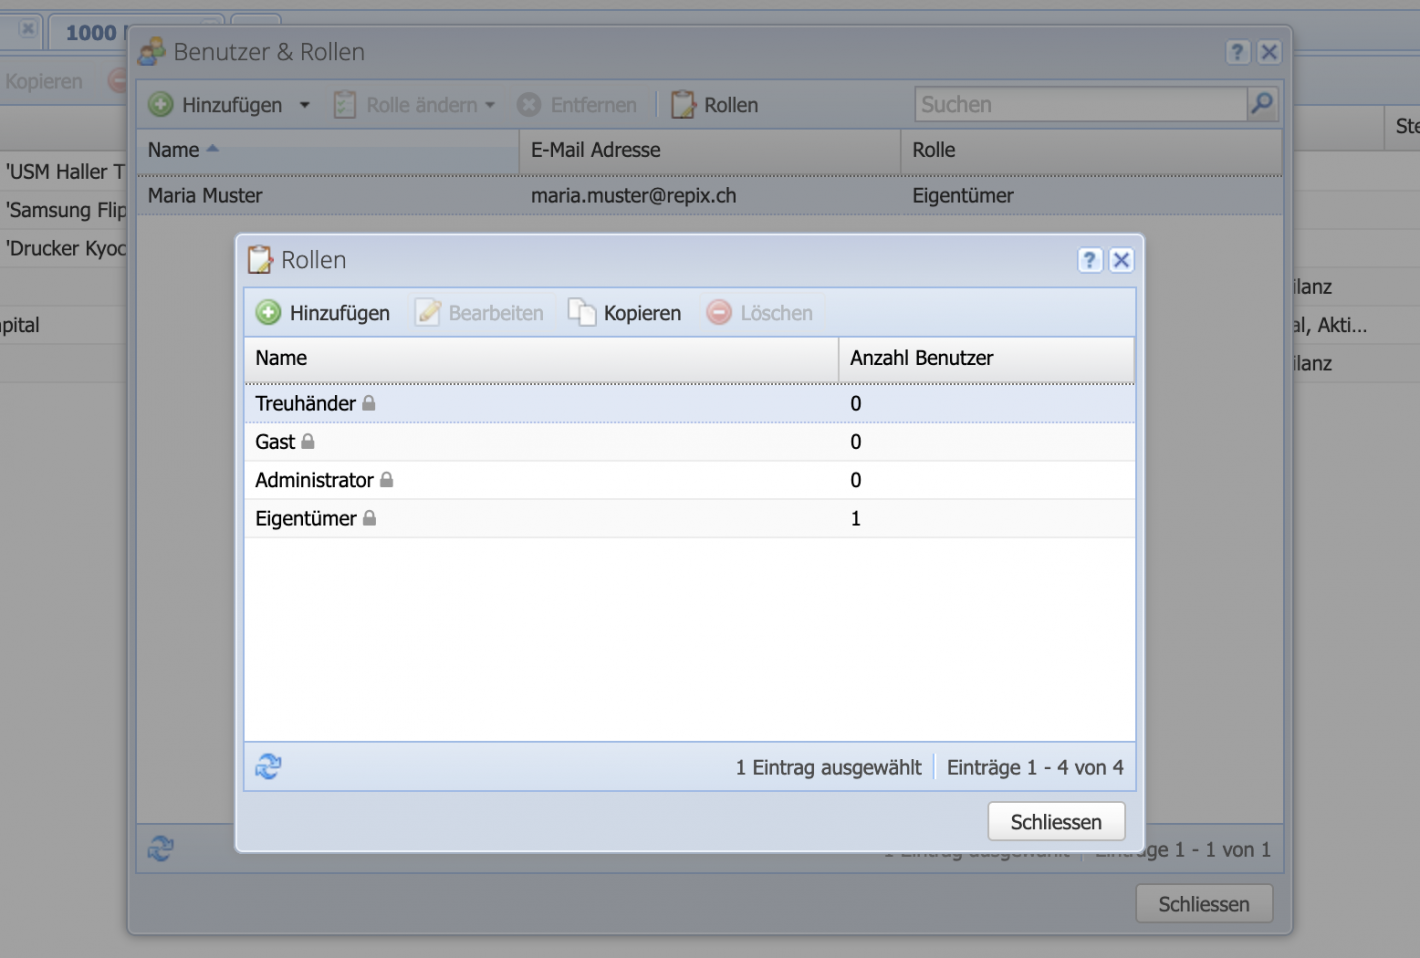
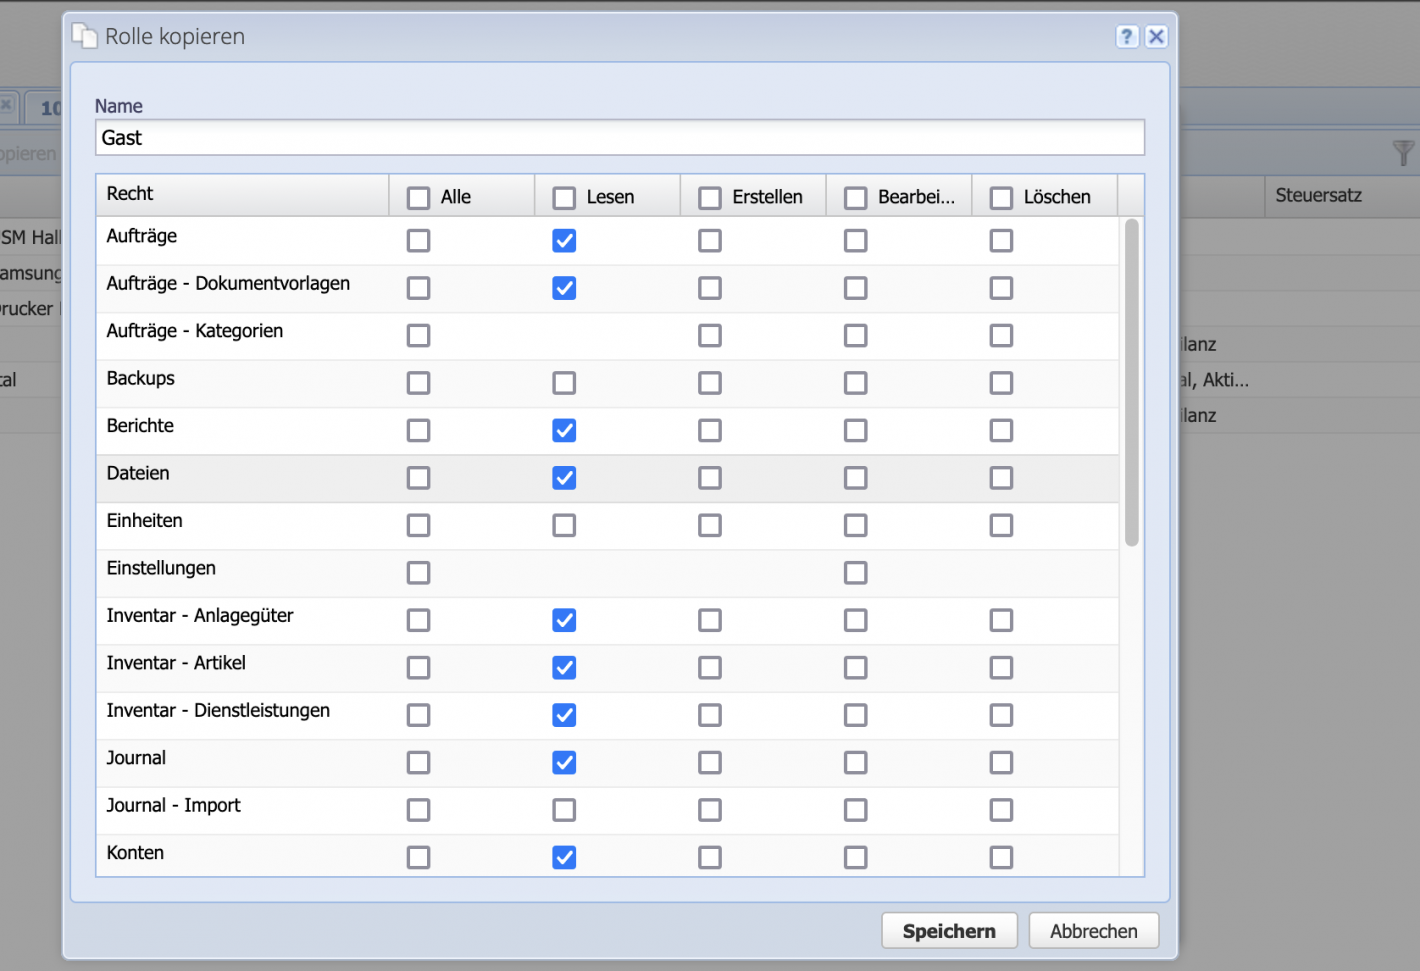
Call up the menu via Settings Users & Roles Roles. Either copy an existing role or add a new one. For example, the Guest role has read-only access and cannot enter data, but can look at everything. A good choice.

The standard roles with the lock symbol cannot be changed. However, a copy can be created with your own customisations.

Screenshot of available users in a CashCtrl account.

2. Configure role

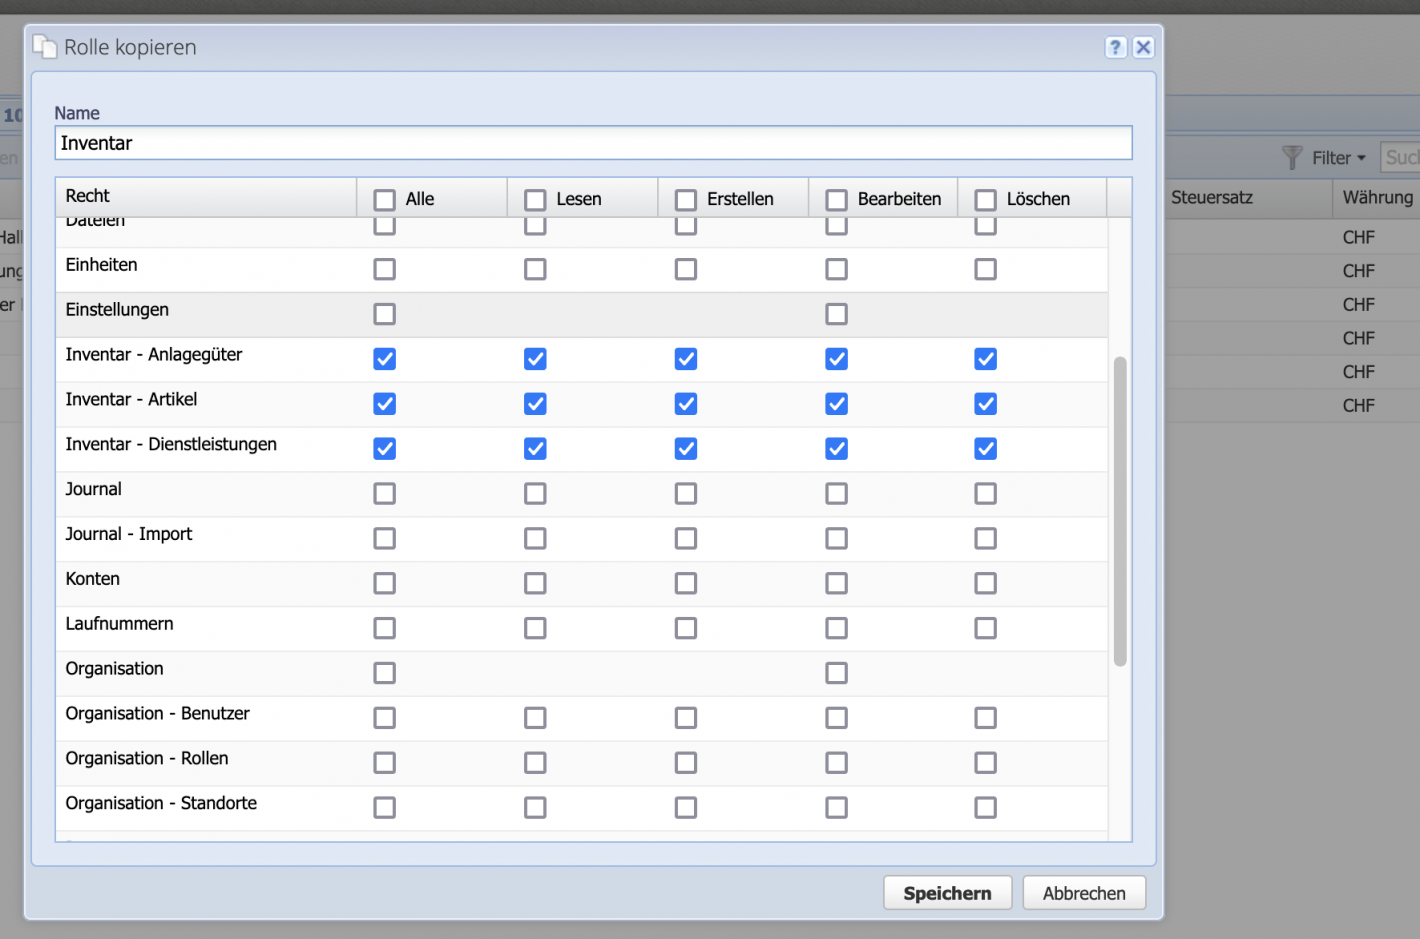
So that the new role can operate only the inventory, all other permissions are removed. For the inventory area, all are selected. This way the person will only see the inventory area. Finish with Save.

Screenshot of a user role in CashCtrl.

3. Logged in view

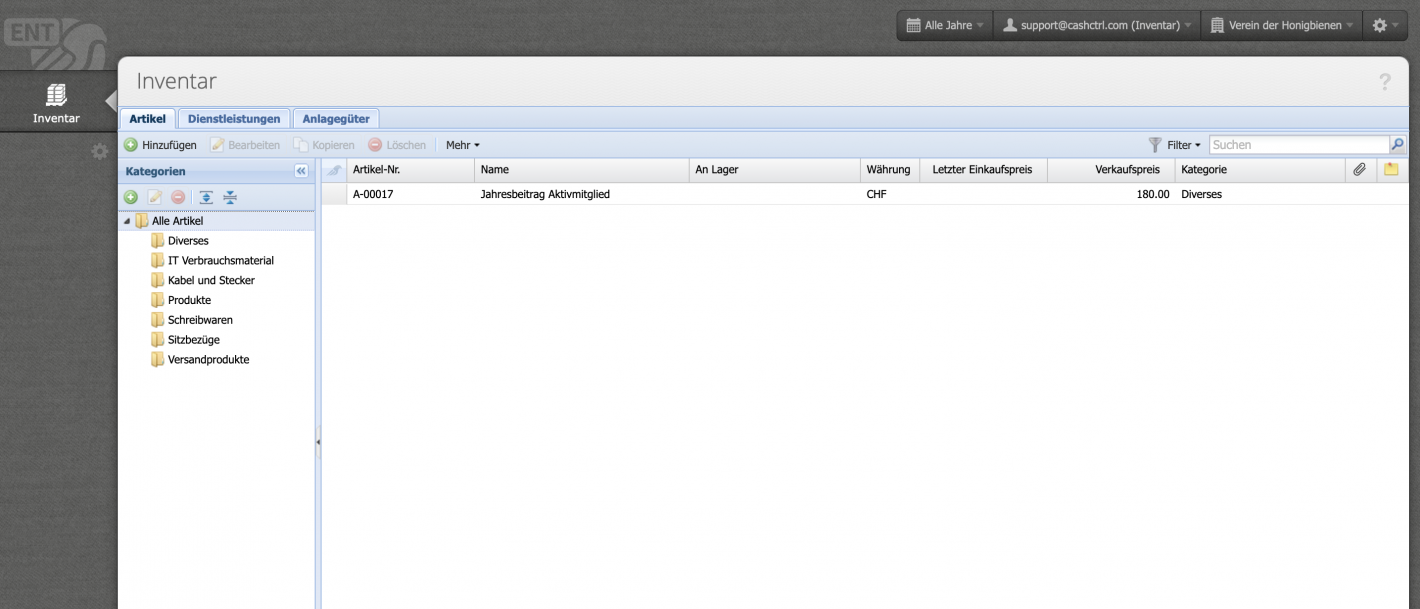
And this is how the access looks afterwards. The role causes that the person can only see and edit the inventory area. The same works for other areas such as contacts.

Screenshot of CashCtrl with reduced view.

4. Create user and assign role

Inviting a new user and assigning a role can be done in one step.

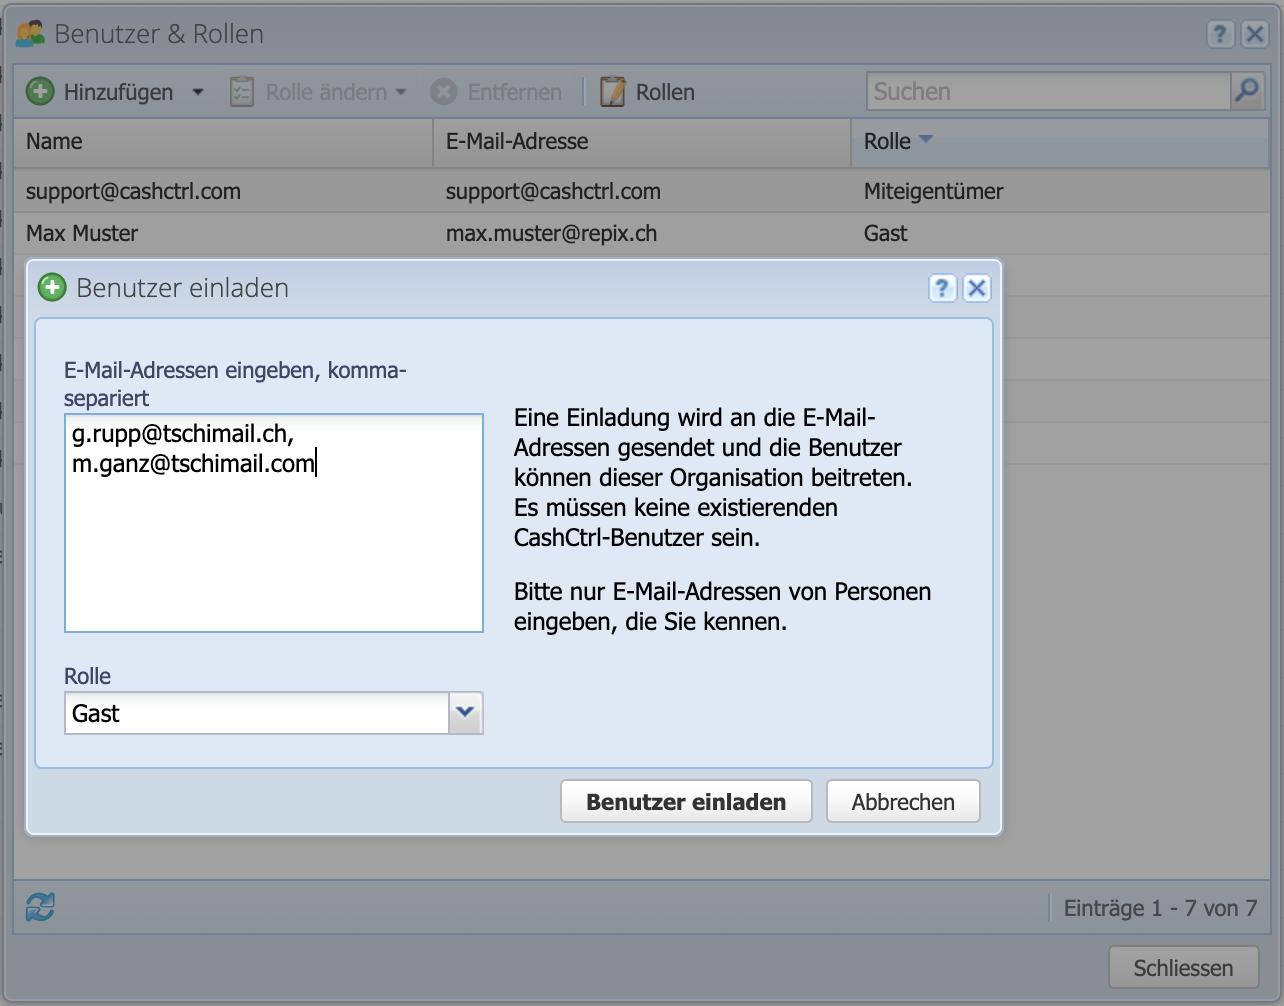
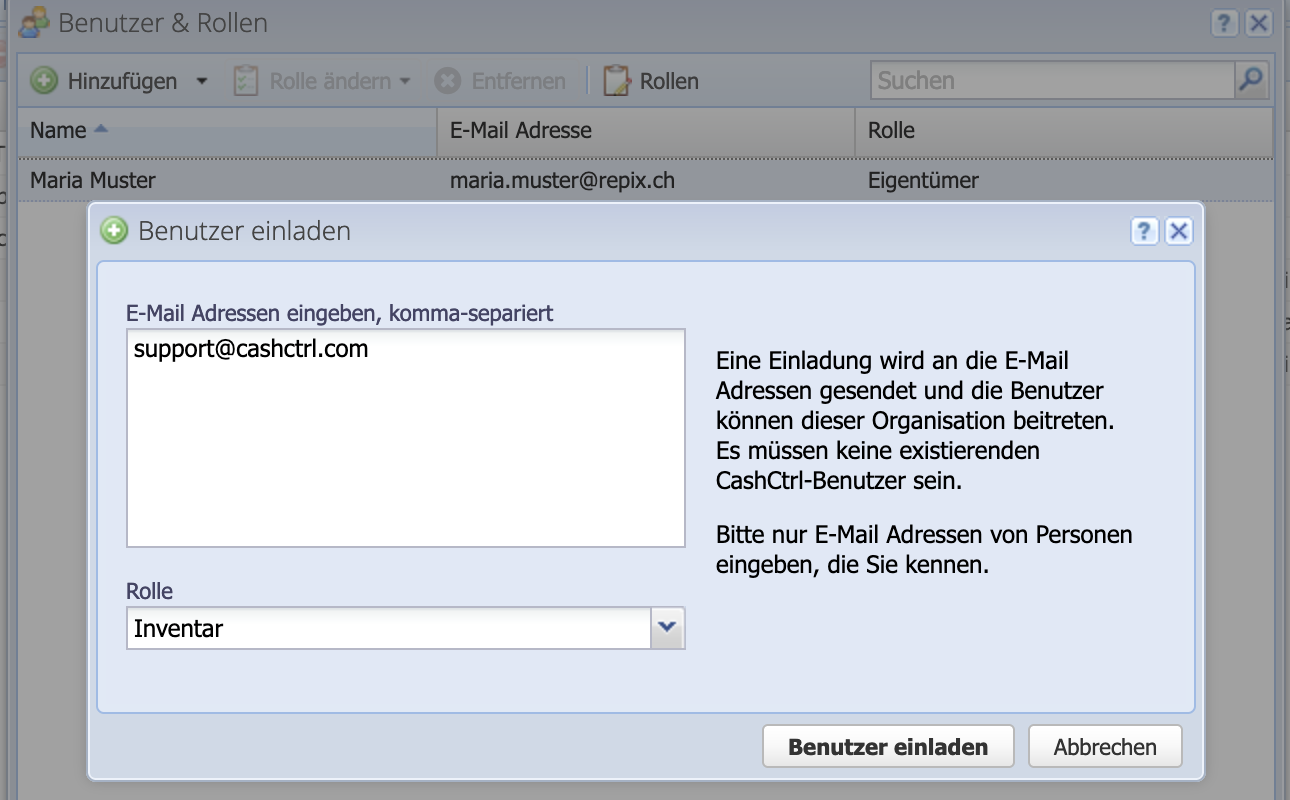
Open the dialog via Add and enter the email address or the same multiple addresses. Then select the role to assign from the dropdown and confirm with Invite user. Done, the mail is sent!

Screenshot dialog to invite new users.

5. Account is created directly

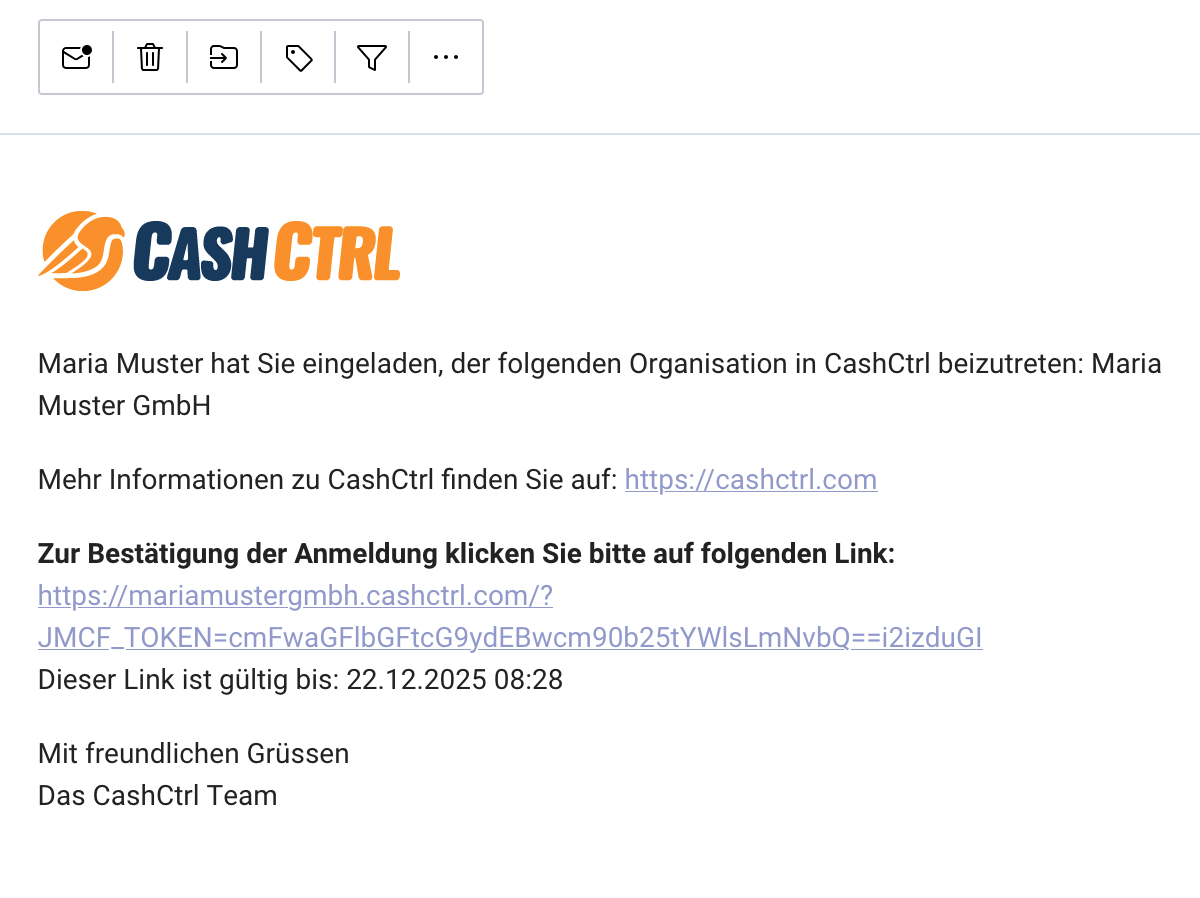
CashCtrl automatically sends an email informing the person that they have been invited. If there is no CashCtrl account under the email address, the accounting software creates one immediately. The invited person does not need to create a new account to be able to work with CashCtrl.

Confirm the token from the email and off you go. Very important: Change the password and set up 2FA.

Screenshot of the sent email with password and access data for CashCtrl login.

6. Good to know: Permissions

The individual columns show the different access types: All/ Read/ Create/ Edit/ Delete. CashCtrl does not make any specifications as to which rights must be assigned, that is up to you. However, certain configurations are contradictory and therefore do not work. In case of doubt contact the support.

Or if you want to know right now, have a look at the documentation.

Screenshot of exact user role management in CashCtrl.