Import Twint/ Paypal/ Stripe payments

Tutorial: Transaction data from payment service providers can be imported into CashCtrl. This is made possible by the generic importer for Excel and CSV files.

Content 

  1. Open import dialog
  2. Select file
  3. Mapping (Booking 1): Assign the revenue posting
  4. Mapping (Booking 2): Create the expense posting for the fee
  5. Options: Custom fields/ cost centers/ conditions
  6. Check and confirm bookings
  7. Execute import
  8. Good to know
Screenshot von importierten stripe Buchungen

Transaction data from payment service providers like Twint, Paypal or Stripe contain all information in one row.
When importing with CashCtrl, multiple bookings can be generated from one line, e.g. one for the revenue and one for the transaction fee.

So imports are also possible from platforms we don't know like Wordpress ... little joke :-)

paypal, stripe, twint log drawings

1. Open import dialog

In the journal, in the Add drop-down menu, open the dialog via Import bookings.

Screenshot of the journal with the add dropdown for "Import bookings"

2. Select file

In the next step, a file can be selected from the CashCtrl file manager ( Select file) or from the computer ( Upload file ). Alternatively, a file can be dragged and dropped into the dialog window.

Confirm with Next .

Screenshot of the Import Bookings dialog where the file to import can be selected or dragged and dropped.

3. Mapping (Booking 1): Assigning the revenue entry

This step defines which columns from the file will be assigned to the fields in CashCtrl. Either a column from the file or a fixed value can be selected. To do this, click on the dropdown menu and select the desired column or define a fixed value.

In the screenshot, the booking of the income is shown as an example and a fixed value is selected for the description.

Screenshot of the mapping dialog to create the first booking for the revenue

4. Mapping (Booking 2): Creating the expense booking for the fee.

The can be used to create the mapping for another booking. For the second booking the fee is configured for the example and the screenshot on the right. This is in the column "fee" of the original file.


Screenshot of the mapping dialog for creating the second booking for the fee

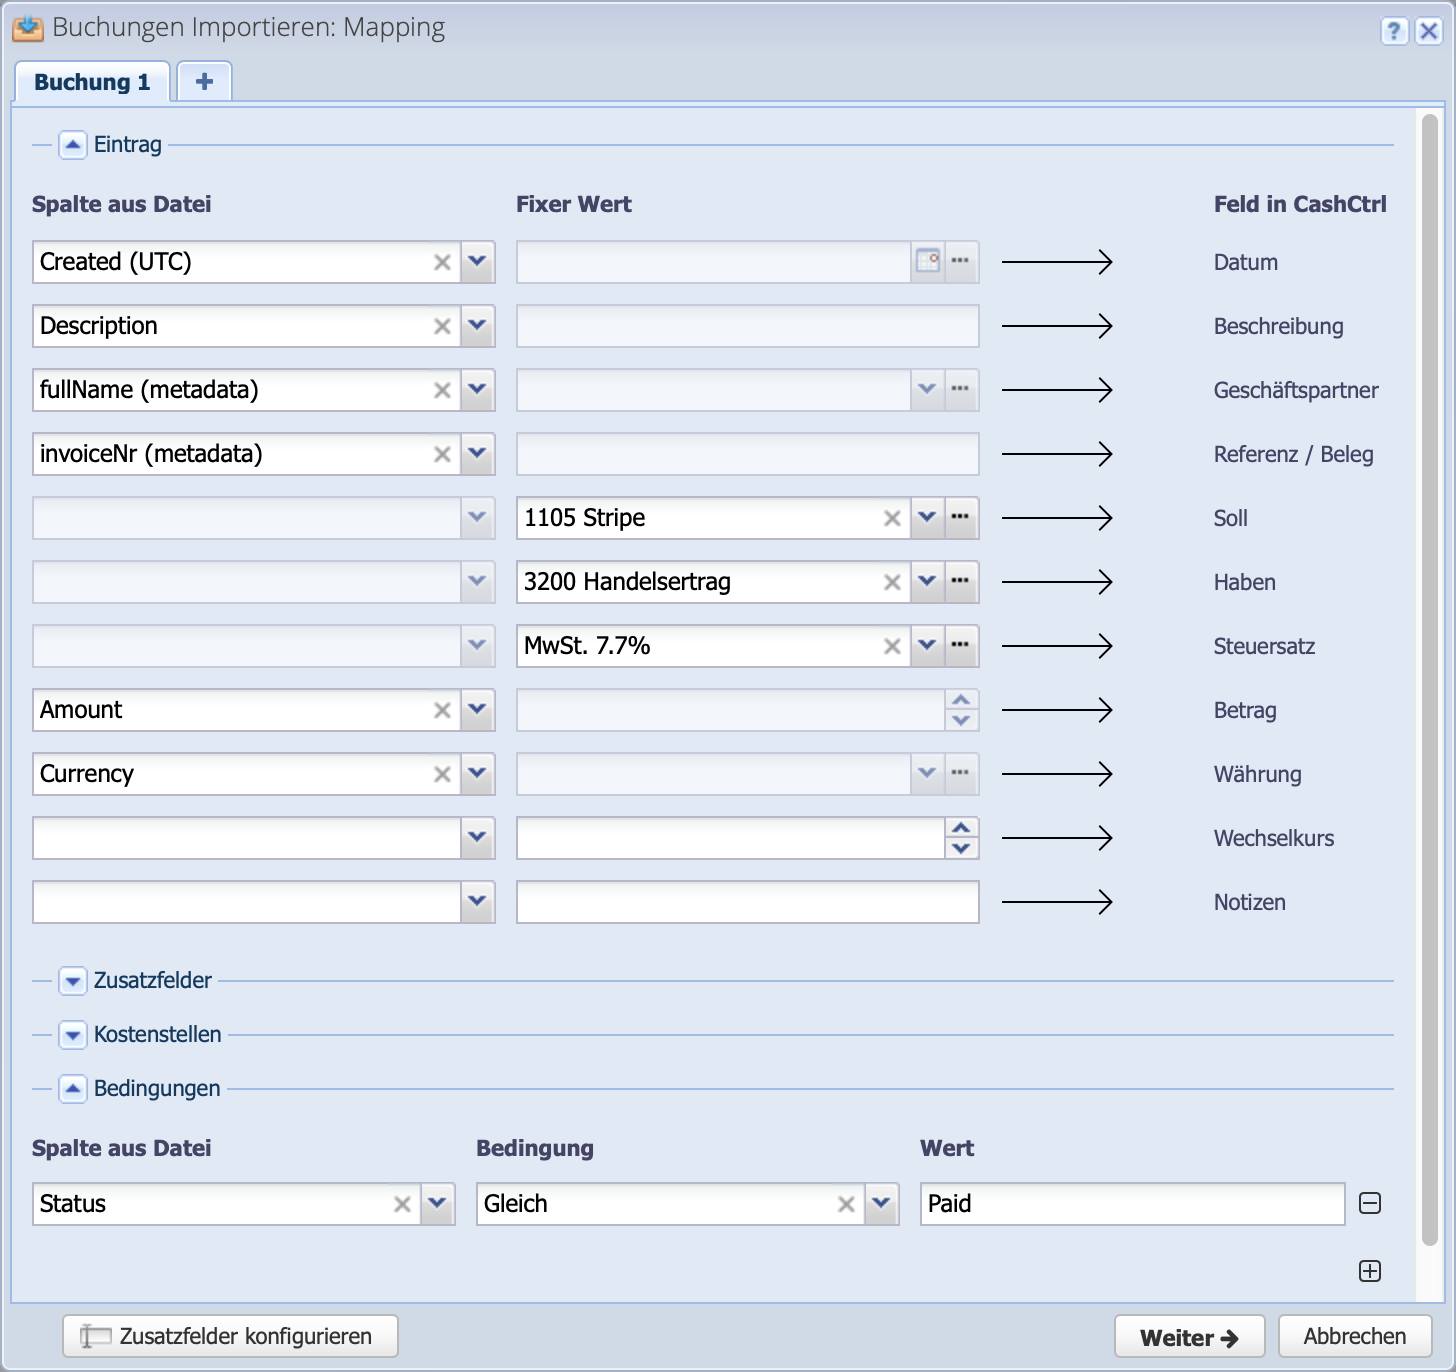
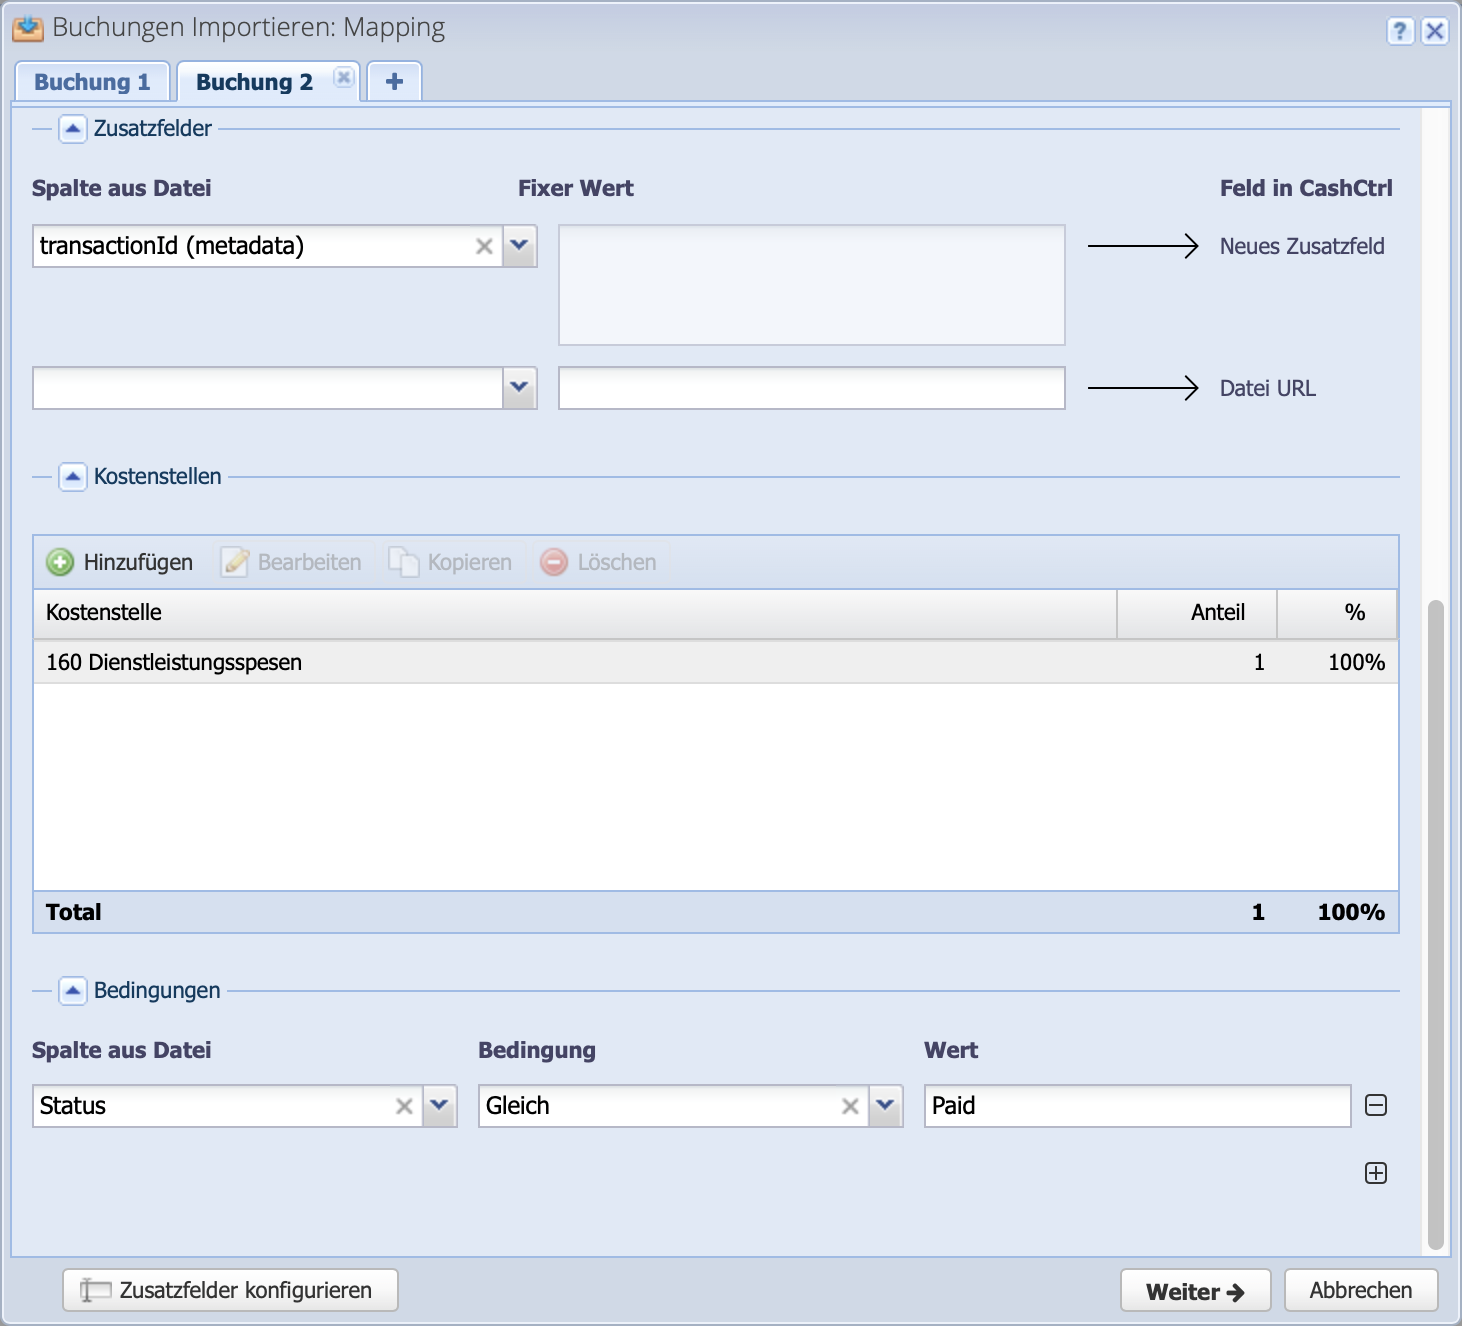
5. Options: custom fields, cost centers or conditions

Optionally, further down in the dialog, additional settings can be made for the import.

Custom fields: here, information from the original file can be transferred into additional fields. Custom fields can be created and named directly from the Configure Custom Fields dialog. Alternatively CashCtrl creates a new custom field and names it accordingly.

Cost centers: if desired, cost centers for the bookings to be imported can be stored here. Conditions are an important tool for this, e.g. if only expense bookings are to be provided with cost centers.

Conditions: here conditions can be defined for the import. Columns from the file can be linked with operators and values. For example, only certain accounts, periods, amounts, etc. can be filtered here.


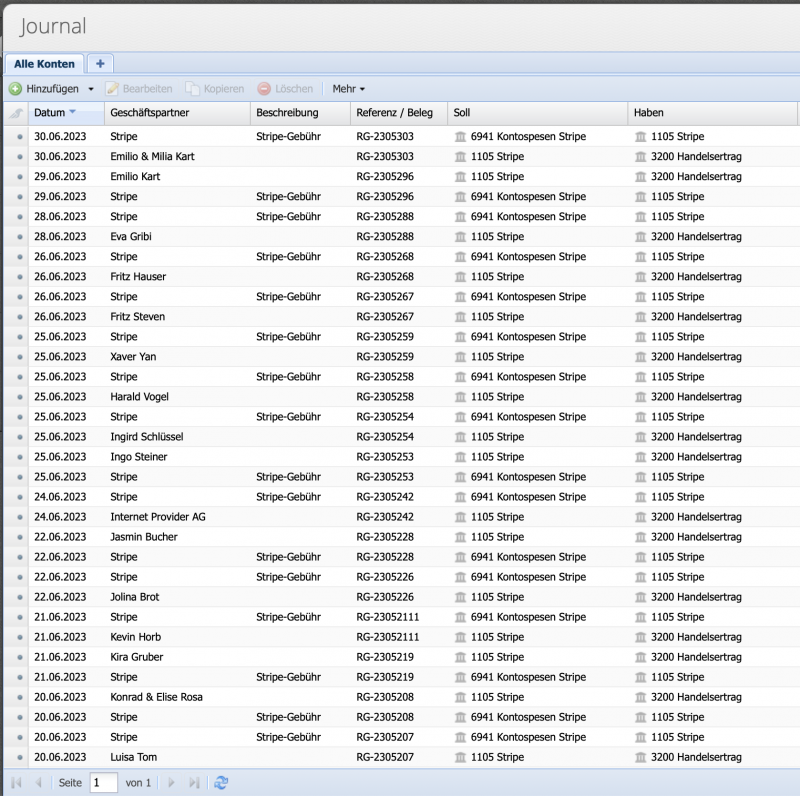
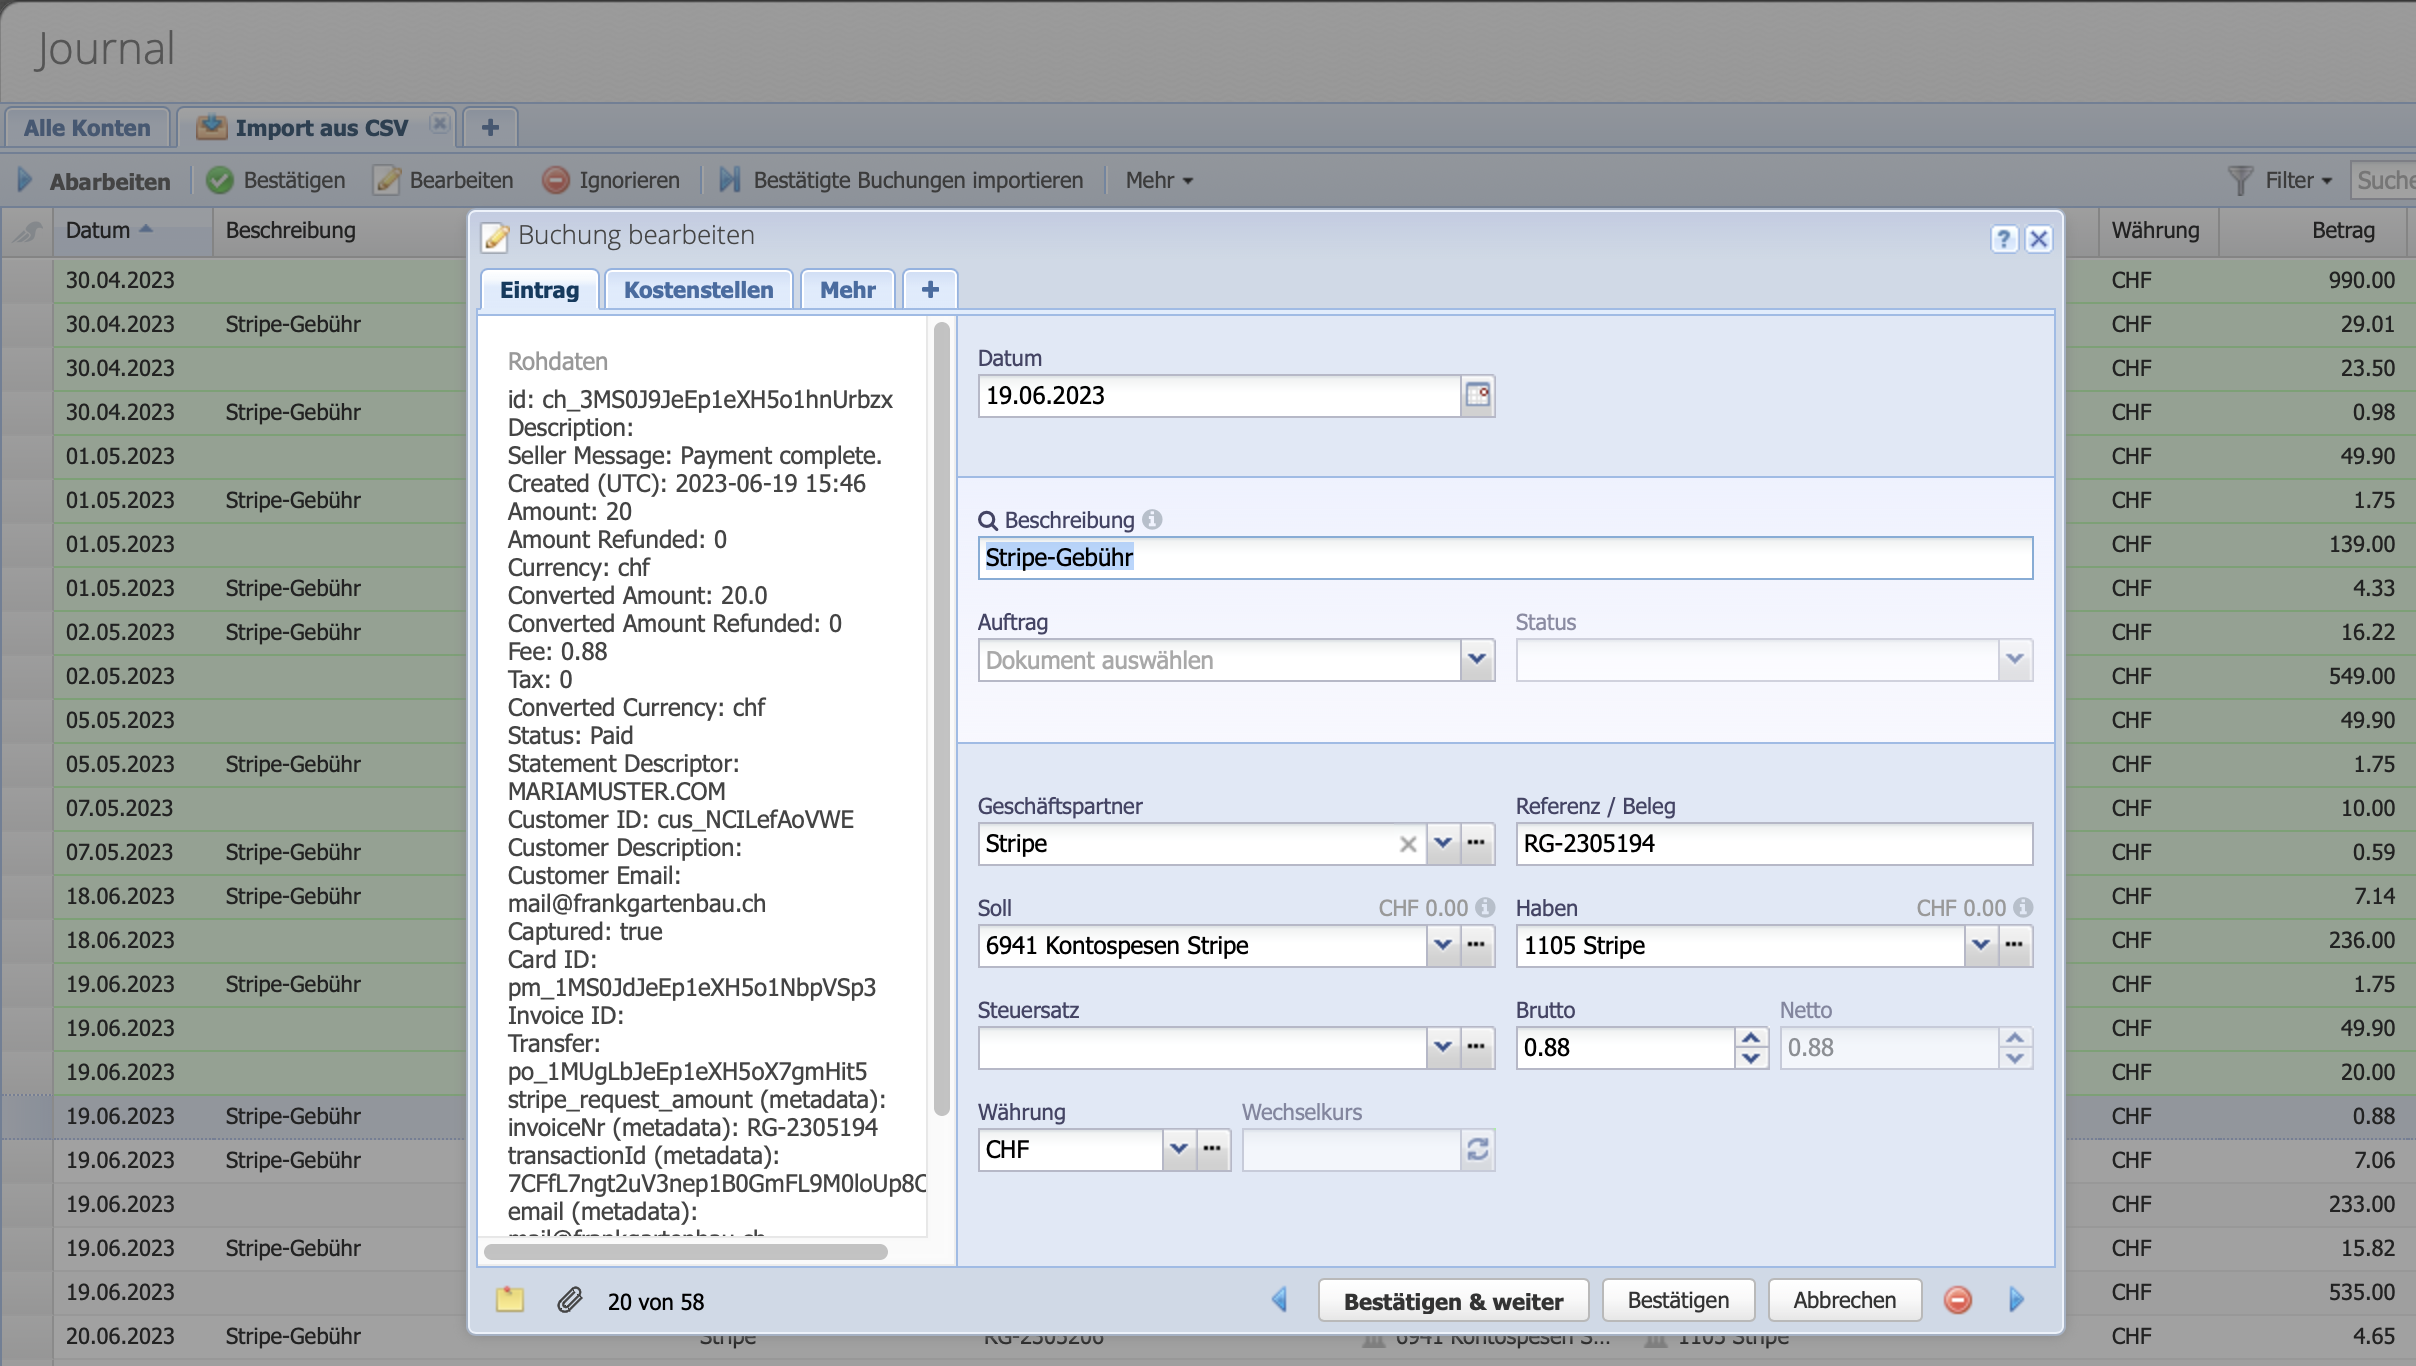
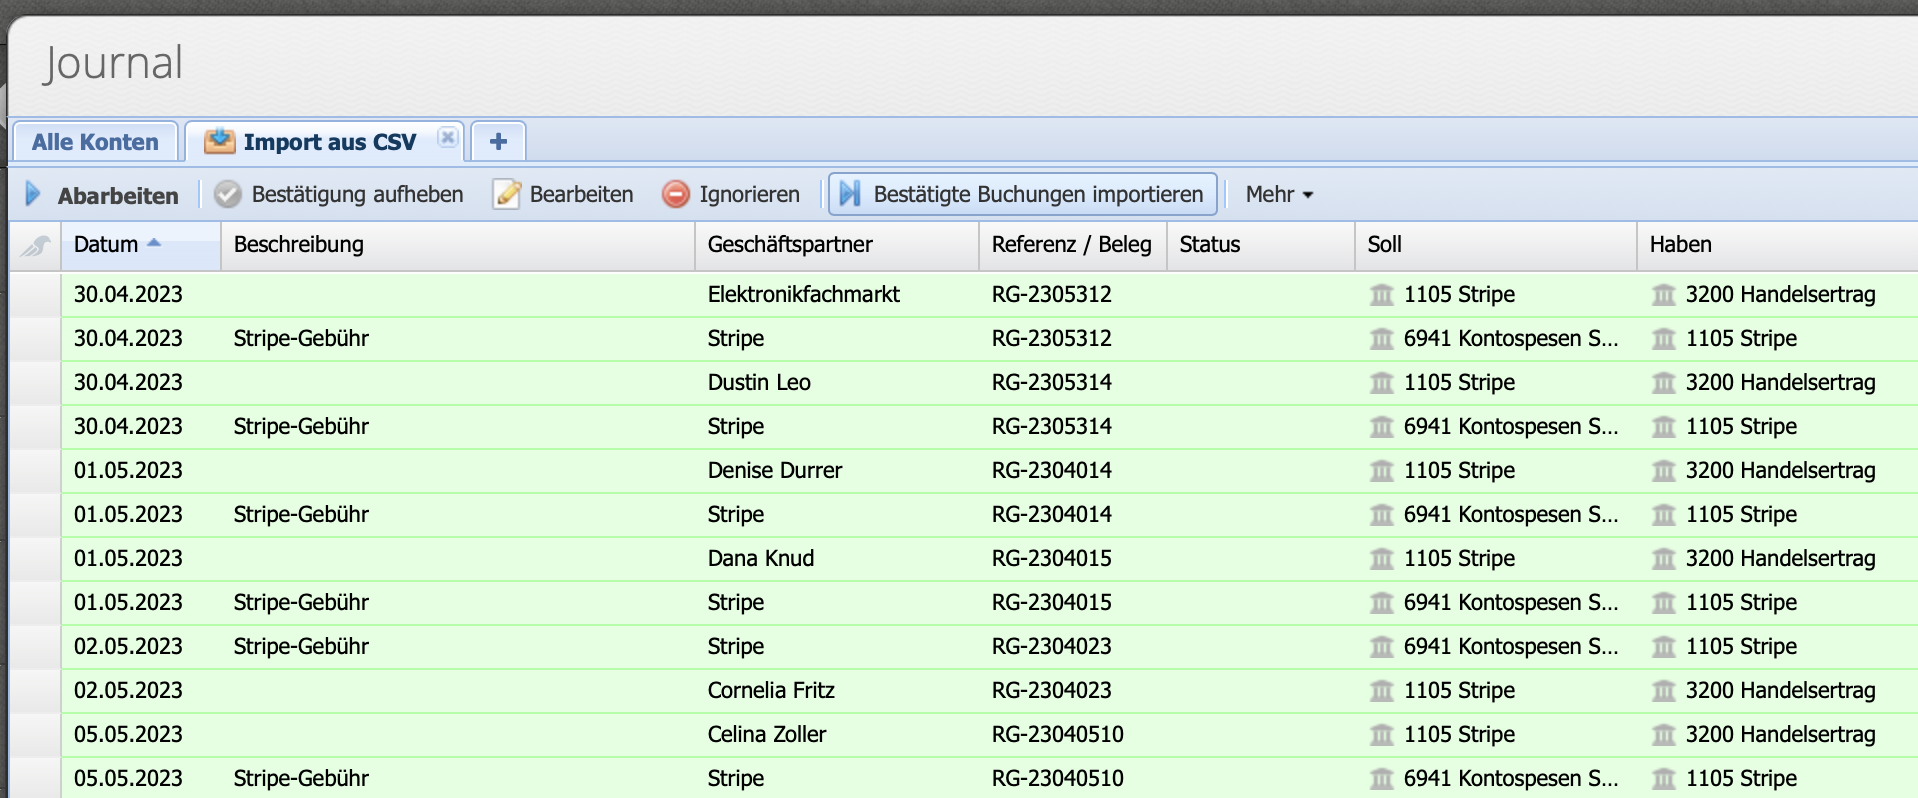
Continue by clicking on Next . The bookings to be imported will now be generated and displayed in an import tab in the journal.

Screenshot of the mapping dialog when importing bookings via Excel or CSV file

6. Check and confirm bookings

By Processing the edit dialog opens. On the left side are the raw data as they are contained in the original file. On the right, the information that will be imported into CashCtrl. At the bottom left you can see how many bookings are contained in the file.

If a booking is confirmed, it is highlighted in green. It is also possible to select several lines and confirm them as a whole. CashCtrl then automatically jumps to the next line and on to the end of the list.

It is also possible to import only single bookings from a document. Then the tab remains open and already imported bookings are grayed out.

Screenshot of the import session with a booking in edit mode for control purposes

7. Execute import

Once all bookings have been confirmed, they can be imported with import confirmed bookings. Not before this point the bookings will be imported into the accounting. If there are no more bookings, the import tab will be closed at the request of the program.


Screenshot of the import button and green highlighted confirmed bookings

Good to know

  • Any number of transaction rows can be generated from one row in an Excel spreadsheet. In many transaction data from payment service providers, there is only one line for each transaction, in which the turnover, the fee and other information are recorded. The special feature of the CashCtrl Importer is that several transaction lines are created in CashCtrl from one line of the original file.
  • CashCtrl saves the mapping for each file type according to its header, i.e. when importing the next CSV file, the fields "Column from file" or "Fixed value" will already be pre-filled.
  • Refunds: If a purchase is canceled, the purchase amount must be refunded. Depending on the payment service provider, a refund transaction is shown in the csv file for this purpose. To ensure that these are properly created, a 3rd booking (revenue) and 4th booking (fee) may need to be configured.
  • Demo transaction data for testing: Downloadlink
CashCtrl lightbulb