1. Open import dialog
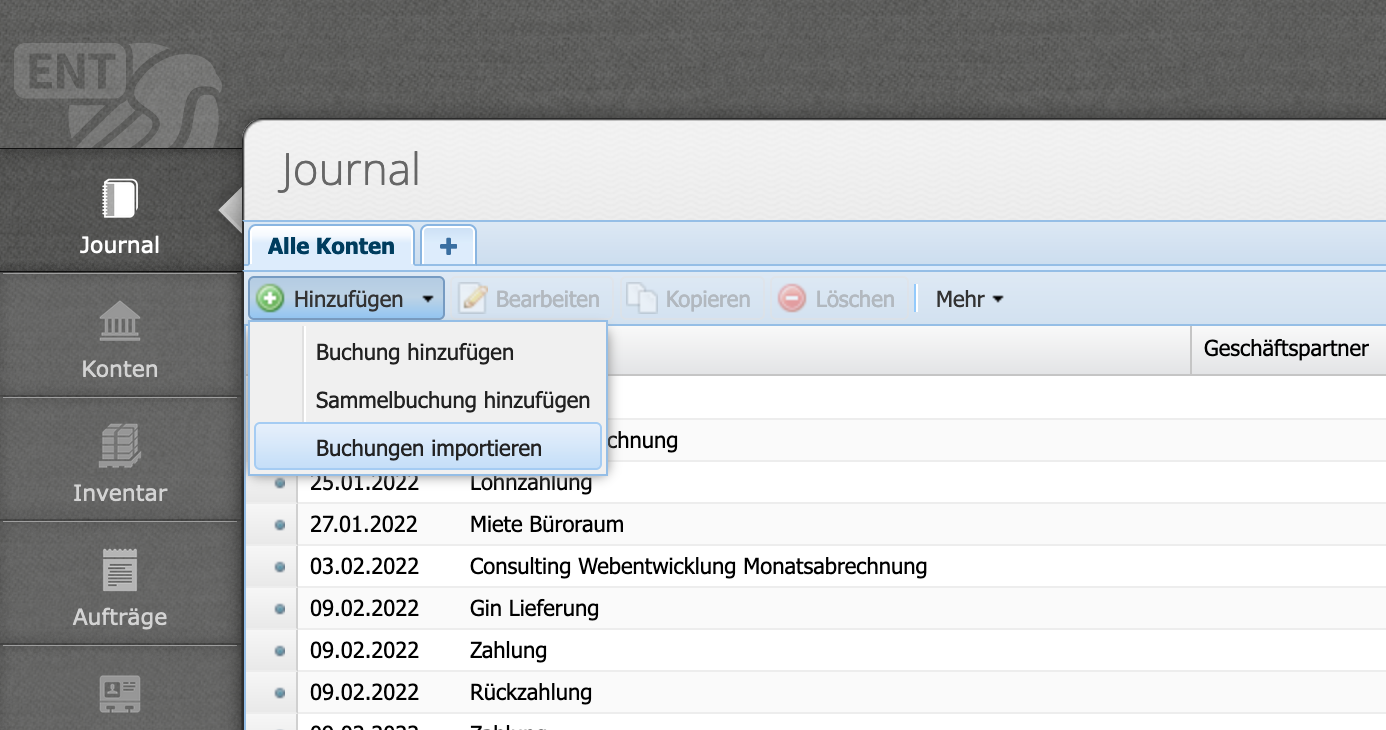
In the journal, in the Add drop-down menu, open the dialog via Import entries.
Please enter a search term.
Error ~ No results could be loaded.
Tutorial: Transfer bookings from other accounting software into CashCtrl with the booking importer for Excel and CSV files. The data is imported and columns can be assigned manually.
Content
In the journal, in the Add drop-down menu, open the dialog via Import entries.
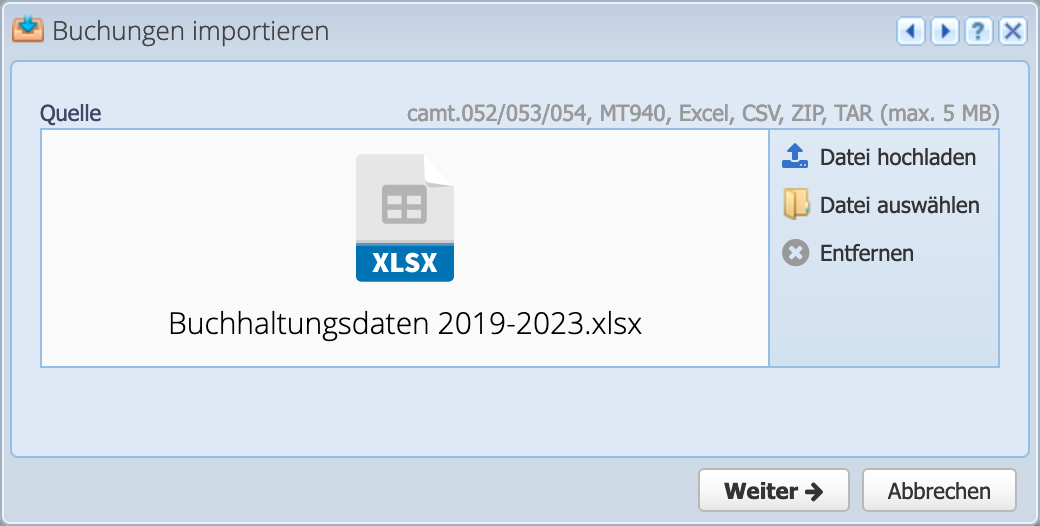
In the next step, select a file from the CashCtrl file manager ( Select file) or from the computer ( Upload file ). Alternatively, a file can be dragged and dropped into the dialog window.
Excel (.xls / xlsx) and CSV files are supported. Furthermore camt.052/053/054 and MT940 are accepted for the bank import, as well as zipped files as .zip or .tar. Here you can find the tutorial for the bank import
Confirm with Next .
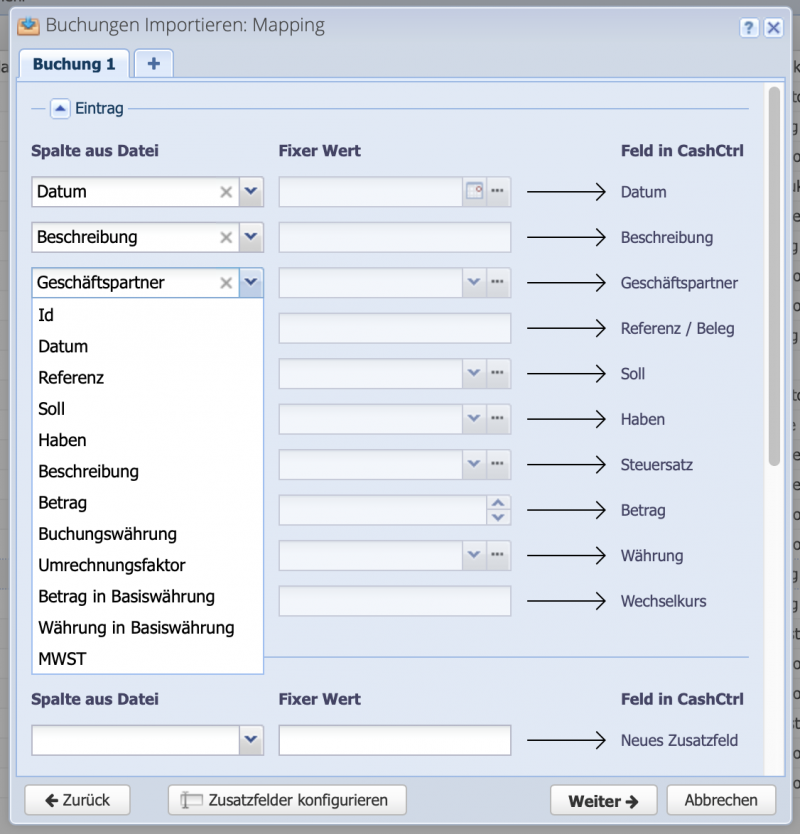
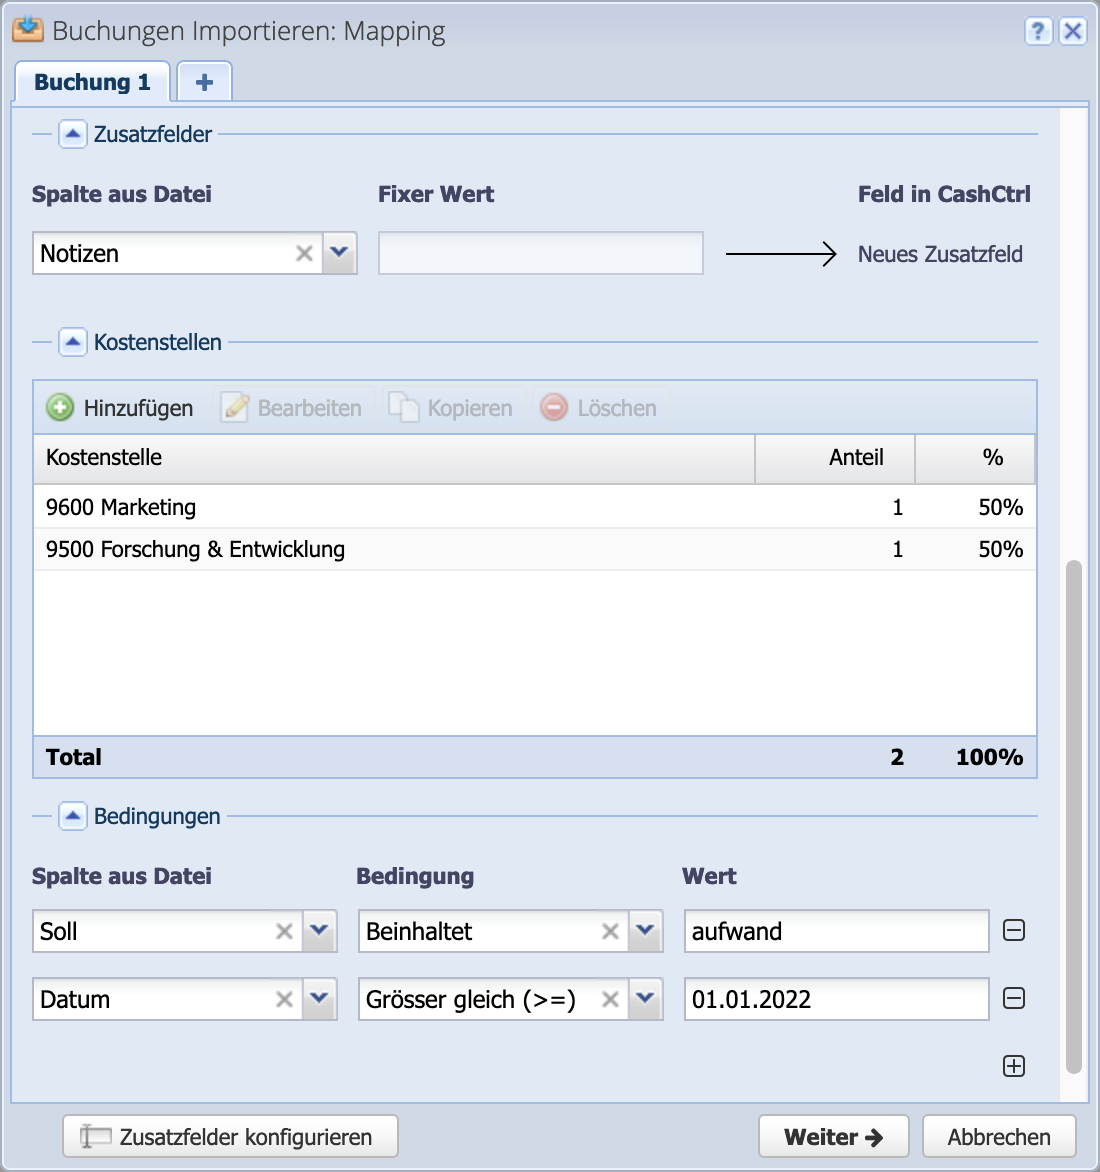
This step defines which columns from the file will be assigned to the fields in CashCtrl. Either a column from the file or a fixed value can be selected. Click on the dropdown menu and select the desired column or define a fixed value.
Further below, columns from the file can be assigned to custom fields, cost centers and conditions can be defined.

Optionally, further down in the dialog, additional settings can be made for the import.
Custom fields: here, information from the original file can be transferred into additional fields. Custom fields can be created and named directly from the Configure Custom Fields dialog. Alternatively CashCtrl creates a new custom field and names it accordingly.
Cost centers: if desired, cost centers for the bookings to be imported can be stored here. Conditions are an important tool for this, e.g. if only expense bookings are to be provided with cost centers.
Conditions: here conditions can be defined for the import. Columns from the file can be linked with operators and values. For example, only certain accounts, periods, amounts, etc. can be filtered here.
Continue by clicking on Next . The bookings to be imported will now be generated and displayed in an import tab in the journal.
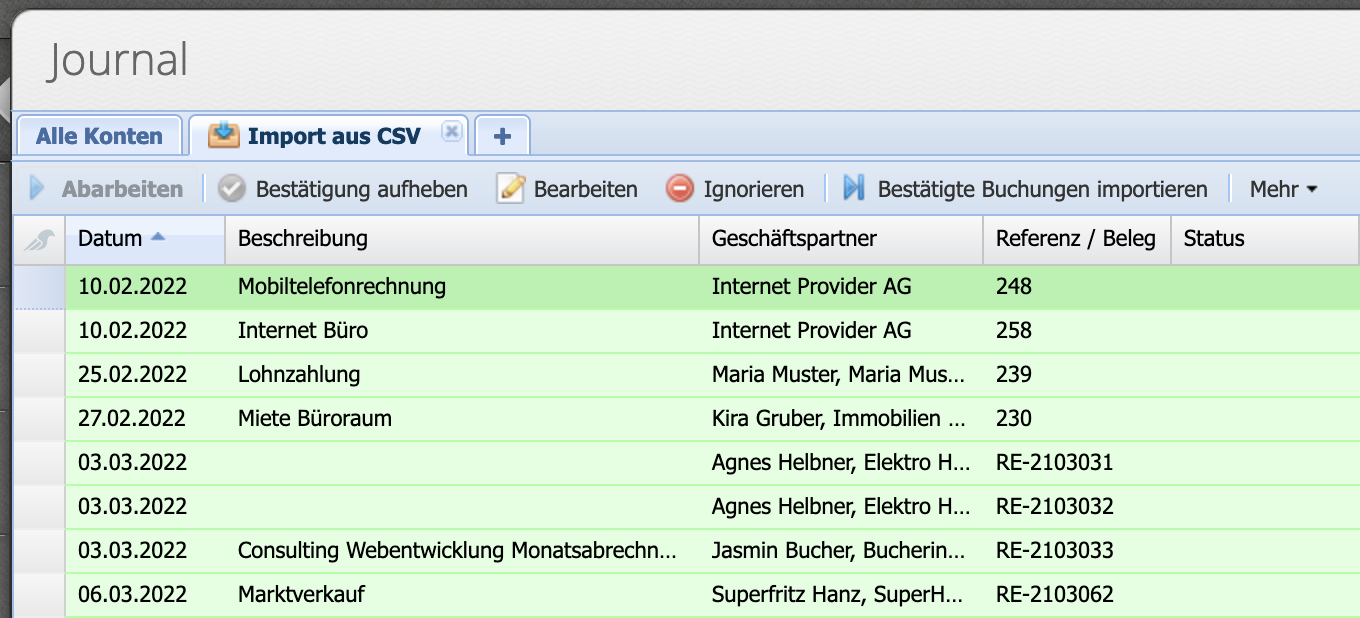
By Processing the edit dialog opens. On the left side are the raw data as they are contained in the original file. On the right, the information that will be imported into CashCtrl. At the bottom left you can see how many bookings are contained in the file.
If a booking is confirmed, it is highlighted in green. It is also possible to select several lines and confirm them as a whole. CashCtrl then automatically jumps to the next line and on to the end of the list.
It is also possible to import only single bookings from a document. Then the tab remains open and already imported bookings are grayed out.
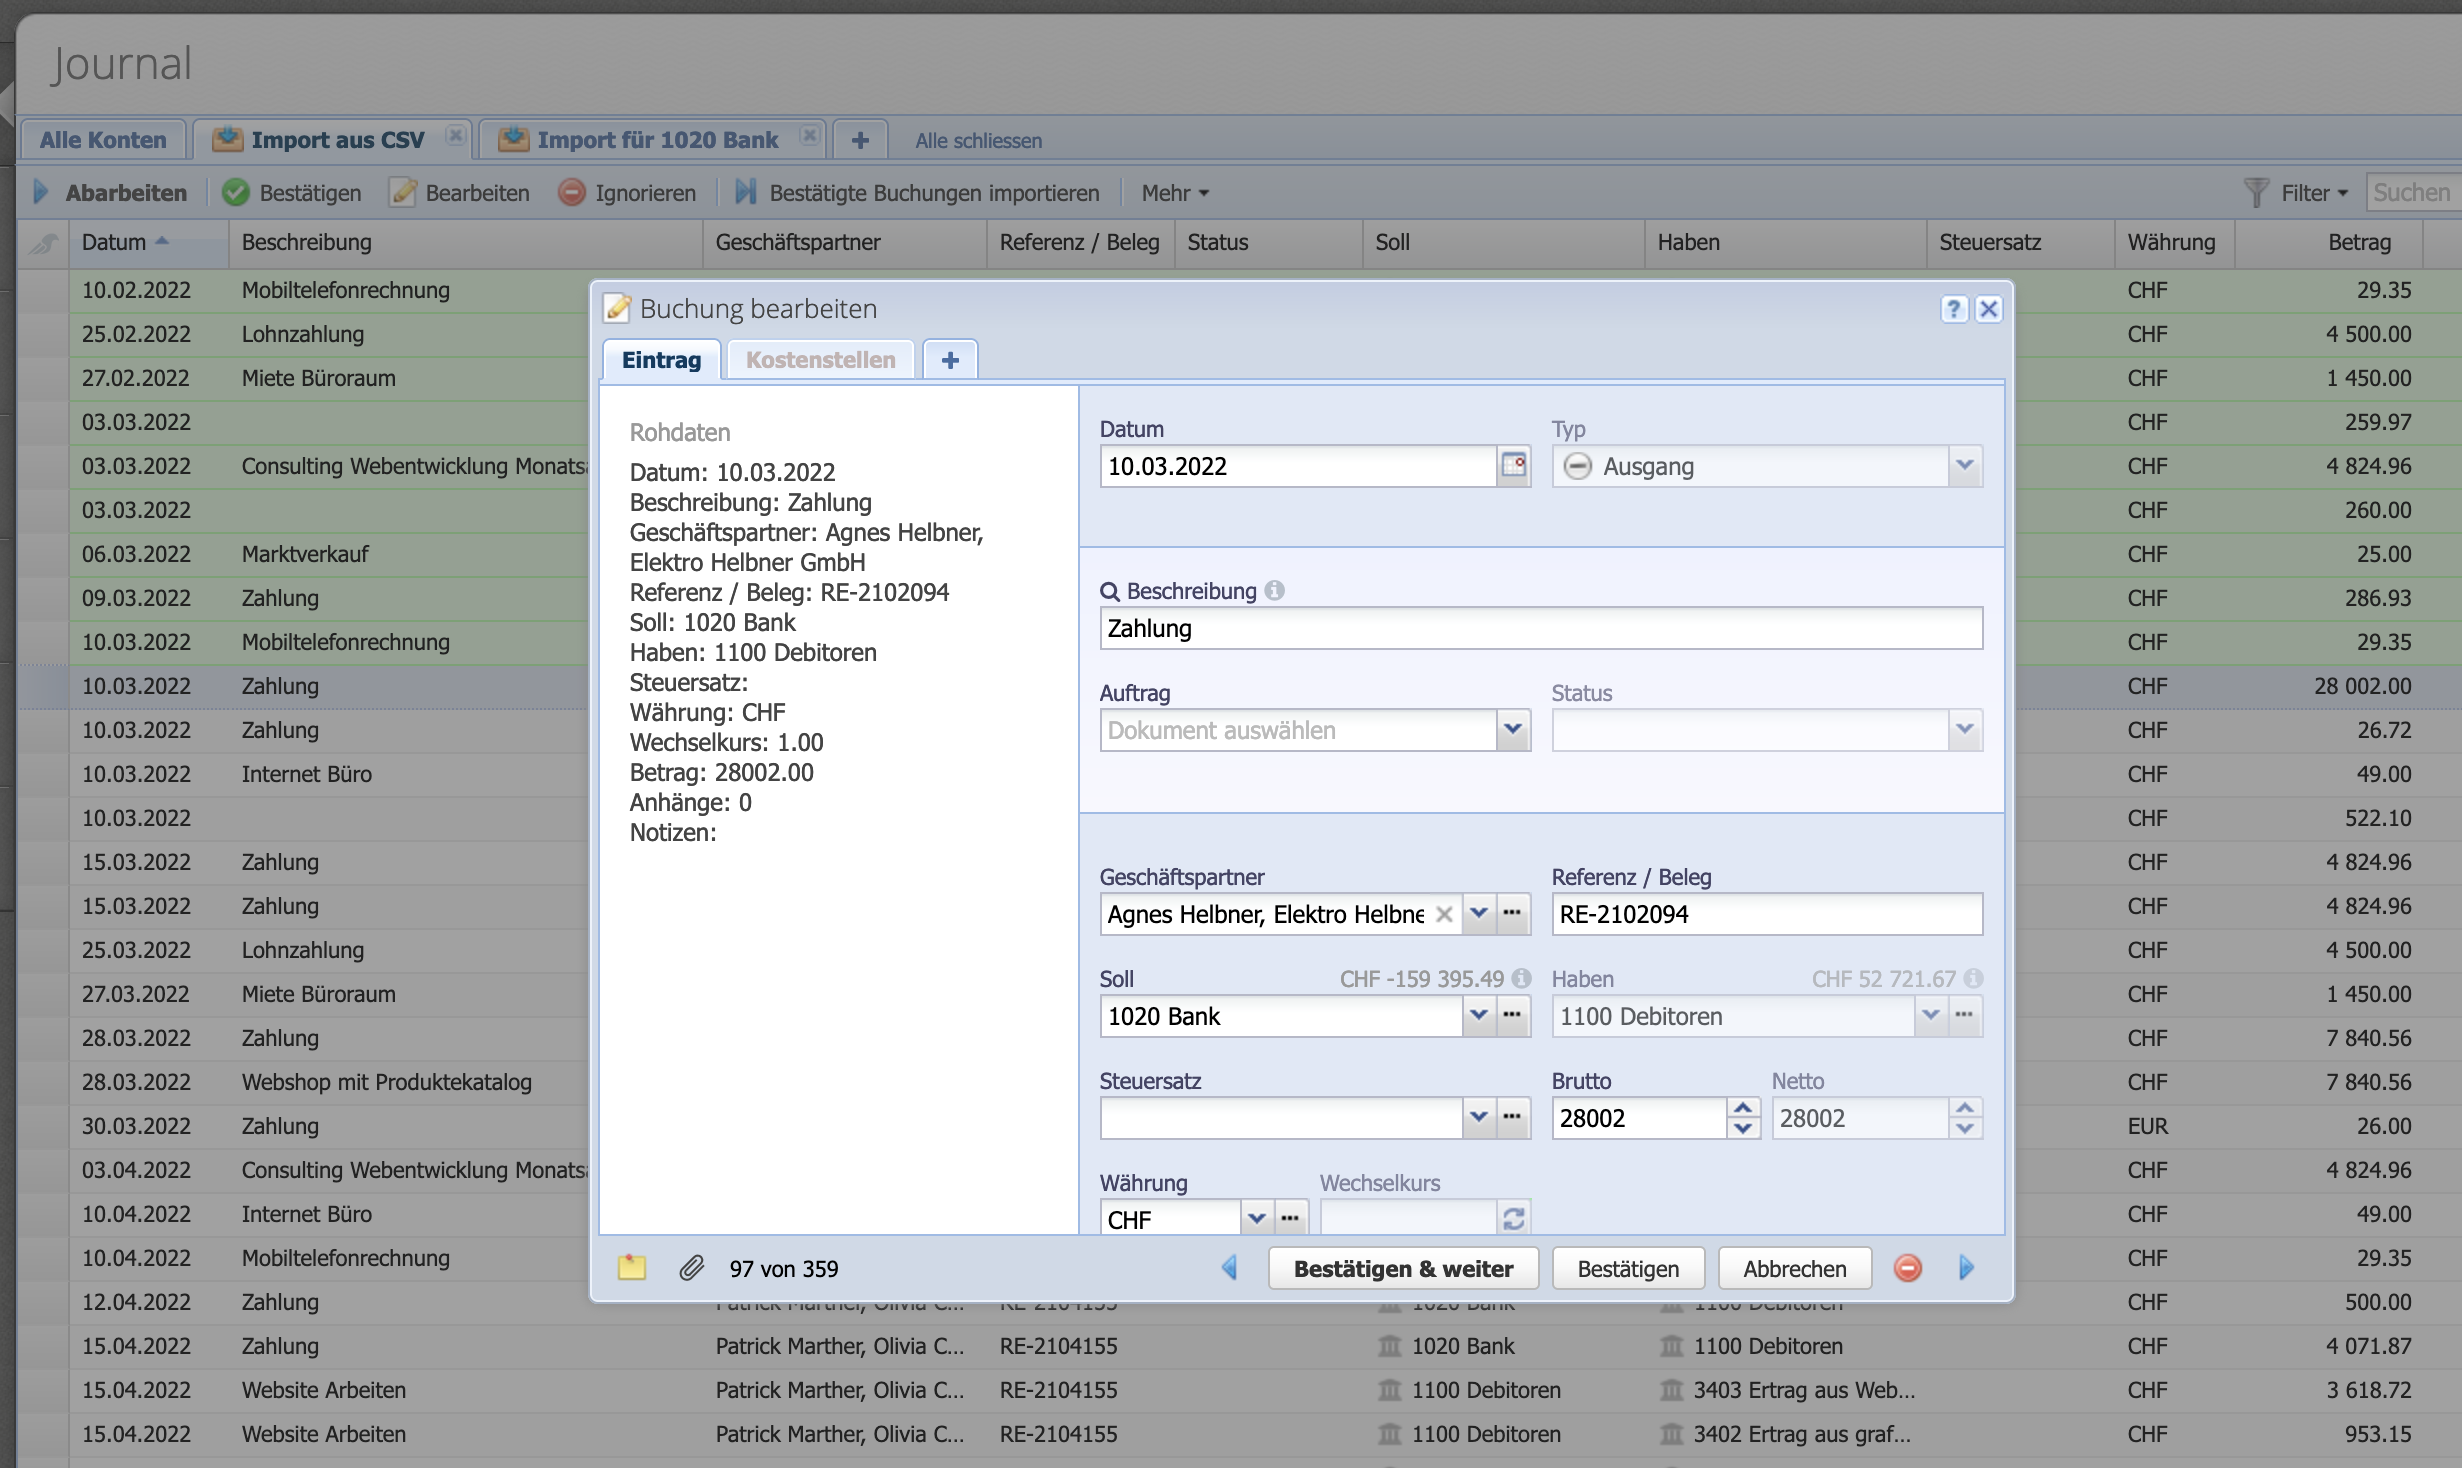
Once all bookings have been confirmed, they can be imported with import confirmed bookings. Not before this point the bookings will be imported into the accounting. If there are no more bookings, the import tab will be closed at the request of the program.