Garage management with vehicle custom fields

This tutorial shows how to enter and manage vehicle information for customers. The information is then displayed on the invoice or order confirmation.
Plus: Vehicles can be searched for by license plate number. This makes it easier to manage multiple vehicles per customer.

Contents 

  1. Create custom fields
  2. Enter vehicles for persons
  3. Create a custom field for vehicle selection
  4. Insert custom fields into the HTML/CSS layout
  5. Create an order
  6. Done: Order view
Screenshot of a garage invoice with custom fields

1. Create custom fields

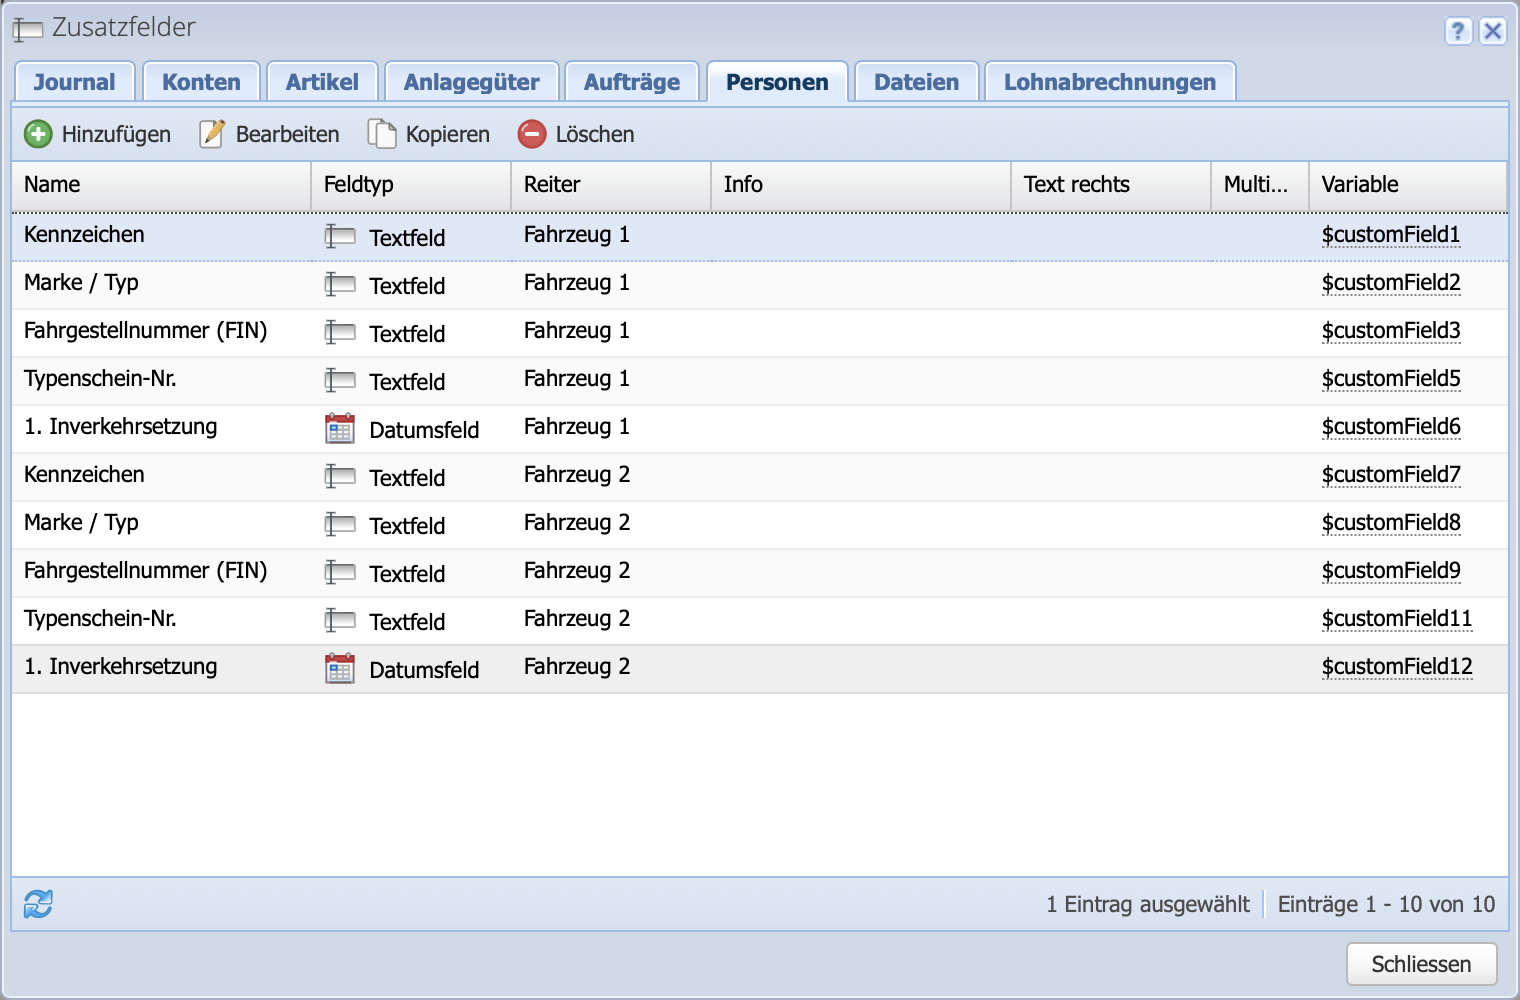
Under Settings Custom Fields select the People tab. Click fa-arrow-right Add to create the first custom field for the license plate. Select Text Field as the field type, and enter "Vehicle 1" in the "Tab" field - if you want to allow multiple vehicles per customer.

If you need to create multiple vehicles, simply create another one by clicking Copy on the license plate custom field. This will then be displayed separately under the "Vehicle 2" tab.

Create the remaining additional fields based on the screenshot.

Screenshot of the custom field dialog

2. Enter vehicles for persons

Go to Persons and enter the vehicle information in the Vehicle 1, Vehicle 2, etc., tabs. Alternatively, this information for existing customers can also be imported into the additional fields via an Excel file.

Go to Excel import tutorial

Screenshot of the Edit Person dialog with the Vehicle 1 tab

3. Create a custom field for vehicle selection

In the custom fields dialog in the Orders tab, create a custom field to select a vehicle when creating an order. If a customer has multiple vehicles, entering the license plate number will retrieve the vehicle-specific information from the custom field in the tab and display it on the invoice.

Additionally, create a custom field for the current mileage. This ensures that the mileage is always entered when the order is created, rather than having to update it separately at the persons contact.

This is illustrated in the screenshot under point 5.

Screenshot of the custom field dialog

4. Insert custom fields into the HTML/CSS layout

Under Settings Order Configuration Layouts, edit (or copy) the layout and insert the HTML (link to the file) and CSS (link to the file) at the locations marked in the screenshot. Here is an explanation of the HTML:

It checks whether an additional field has been filled in:

#if ($customField1 != "")

If multilingual orders are used, a prompt will request the selected language:

#if ($language == 'English')
    License plate:
#elseif ($language == 'Français')
    Plaque d'immatriculation:
#elseif ($language == 'Italiano')
    Targa:
#else
    Kennzeichen:

Finally, the system asks for which vehicle (selected based on the license plate number specified in the order) the custom are to be selected:

#if ($customField1 == $customField17)
    $customField1  ## Kennzeichen Fahrzeug 1
#else
    $customField7 ## Kennzeichen Fahrzeug 2
Screenshot of the layout dialog where the custom HTML/CSS is inserted for the custom fields

5. Create an order

Via Orders click Add to create a new quote or invoice. In the "Vehicle Selection" tab, enter the license plate number of the vehicle for which the order is being created.

Also enter the current mileage.

Screenshot of the "Add Order" dialog, where the license plate number for the order is entered in the "Vehicle Selection tab

6. Done: Order view

Click Save & Open to view a preview of the order. If the new layout has not yet been set as the default, select it from the dropdown menu on the left; otherwise, the custom fields will not be displayed.

The default layout is set in the order categories.

Go to order configuration tutorial

Screenshot of an order preview with the custom fields displayed