If you have been afraid to type the address data of your customers or club members into an accounting software, the import offers a welcome simplification. Member lists and other data are always up to date.
Please enter a search term.
Error ~ No results could be loaded.
Import articles and persons
from an Excel list
Tutorial: Importing items and contacts directly from an Excel list is the easiest way to start in CashCtrl. Typing everything by hand is not necessary. The import of articles and contacts is identical. In this example, contacts are imported.
Content
- Open import dialog
- Select file
- Assign columns
- Assign custom fields
- Execute import
- Result
- Good to know
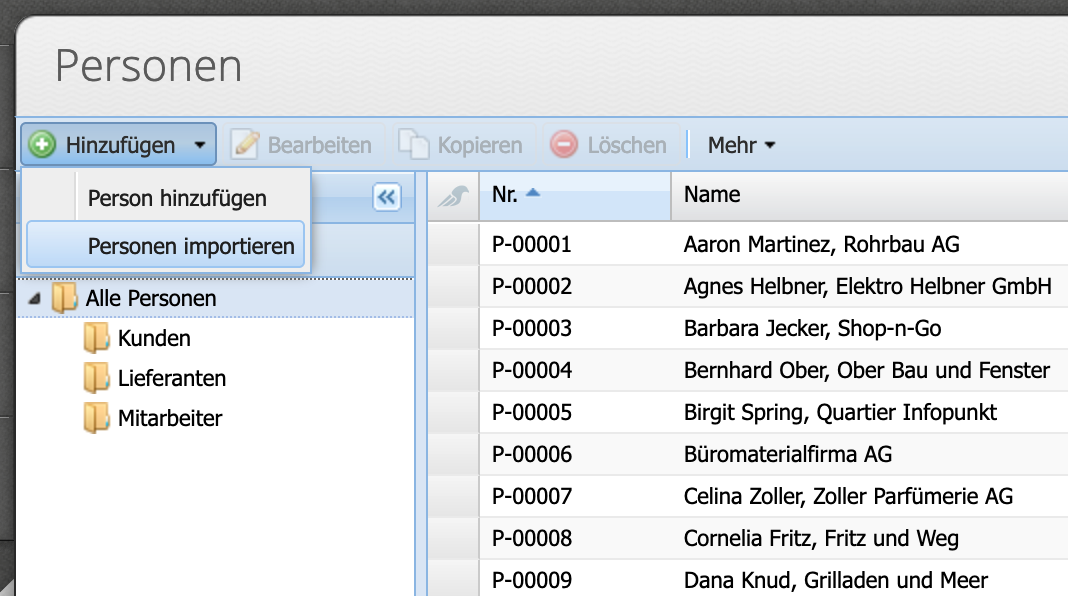
1. Open import dialog
The import function can be found in the Persons and Inventory module in the drop-down menu at the Add button.
Important: It is advisable to make a manual backup before importing. This makes it easy to return to the previous state if something has not been assigned correctly during mapping.
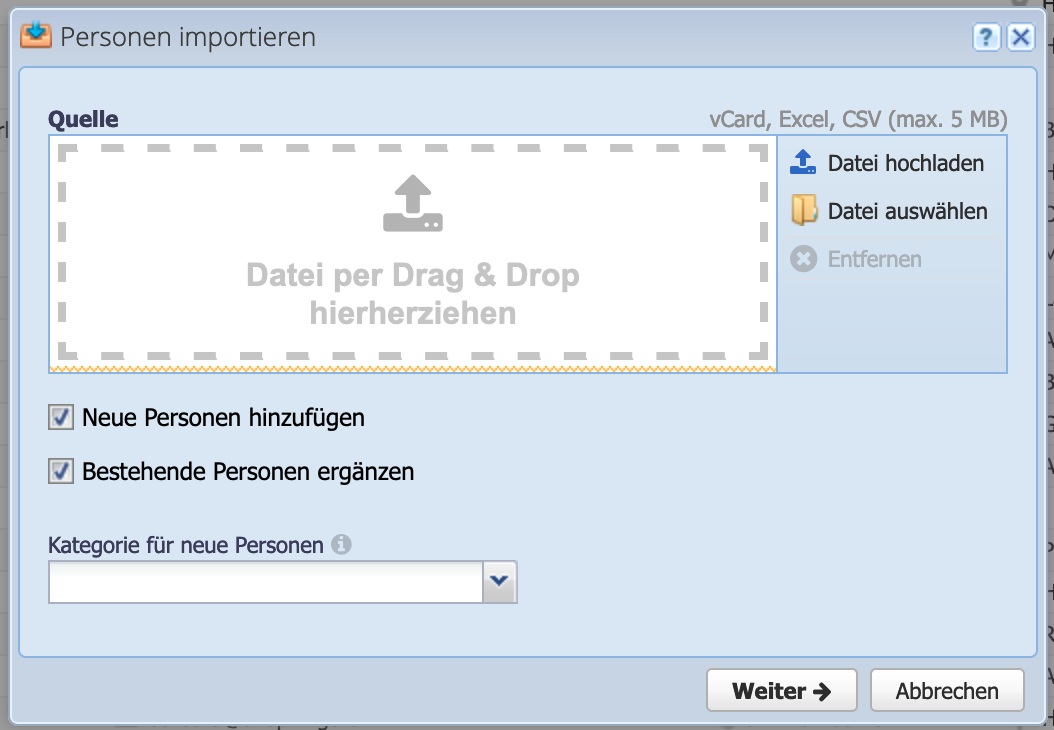
2. Select file
The file to be imported can be dragged and dropped into the window or selected from the File Manager. Excel, CSV and VCF files are supported.
Select whether new contacts are to be imported, existing contacts are to be updated or both. If required, the category in which the contacts are saved can be selected. Mutations and duplicate entries are automatically detected and displayed.
Confirm with Next
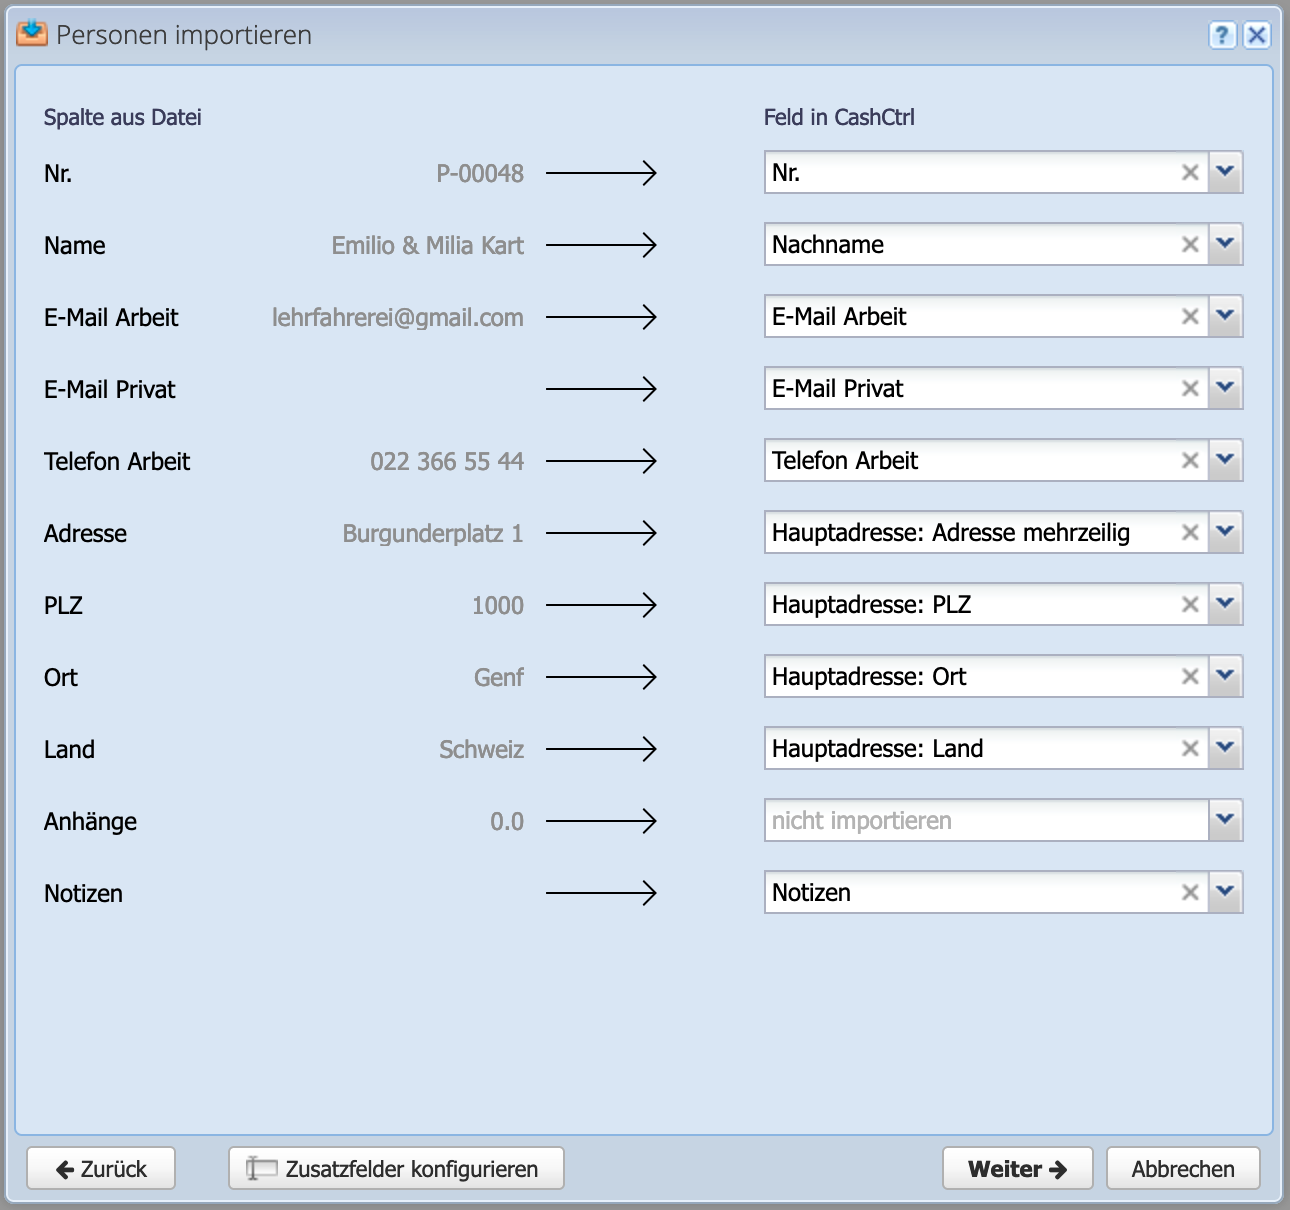
3. Assign columns
In the second dialog the columns from the file are assigned to the fields in CashCtrl. The software already assigns the values (entries from the file) as good as possible. In the middle in gray a sample record is shown.
Go through the list and select the appropriate fields in CashCtrl.
It is partly possible to assign several columns to the same field (e.g. notes). The columns are then imported one after the other, each with a blank line.
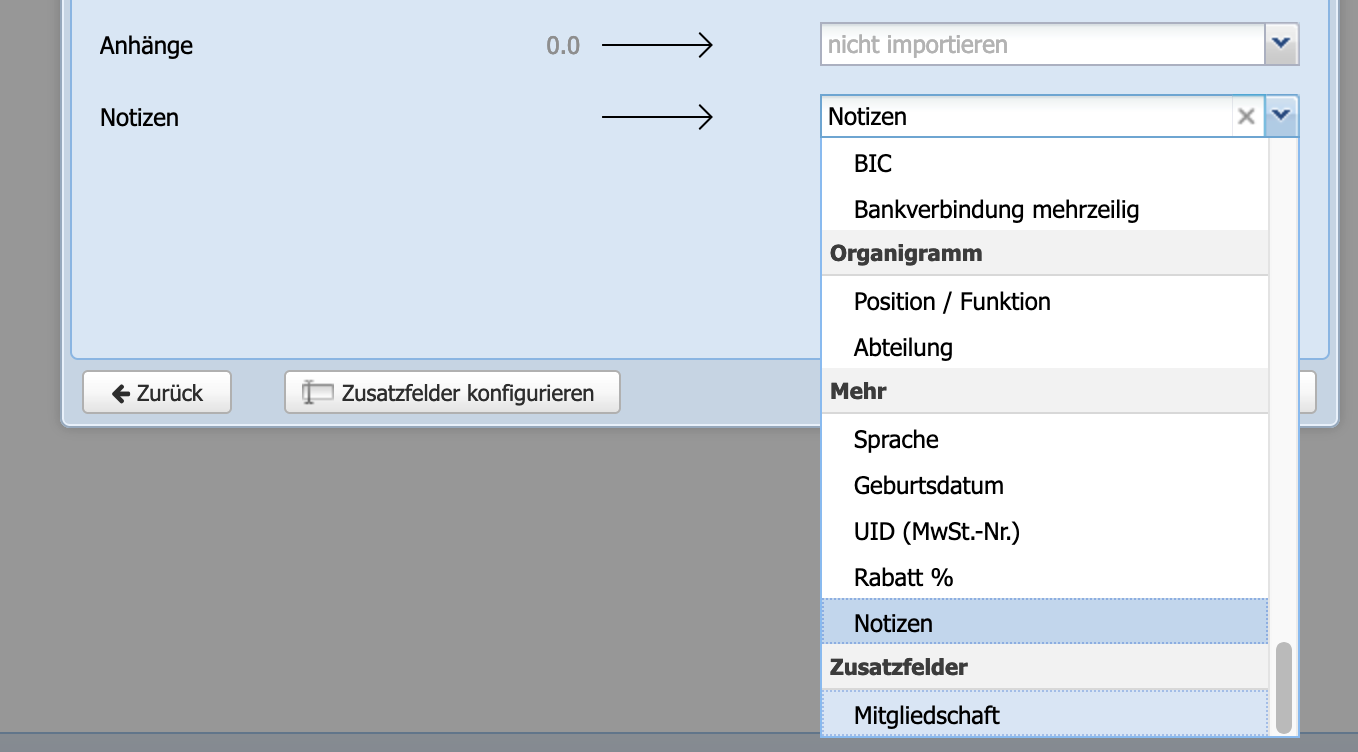
4. Assign custom fields
If CashCtrl PRO is used, custom fields can also be used. Either the already created ones are assigned or new ones can be created directly from the dialog via Configure custom fields.
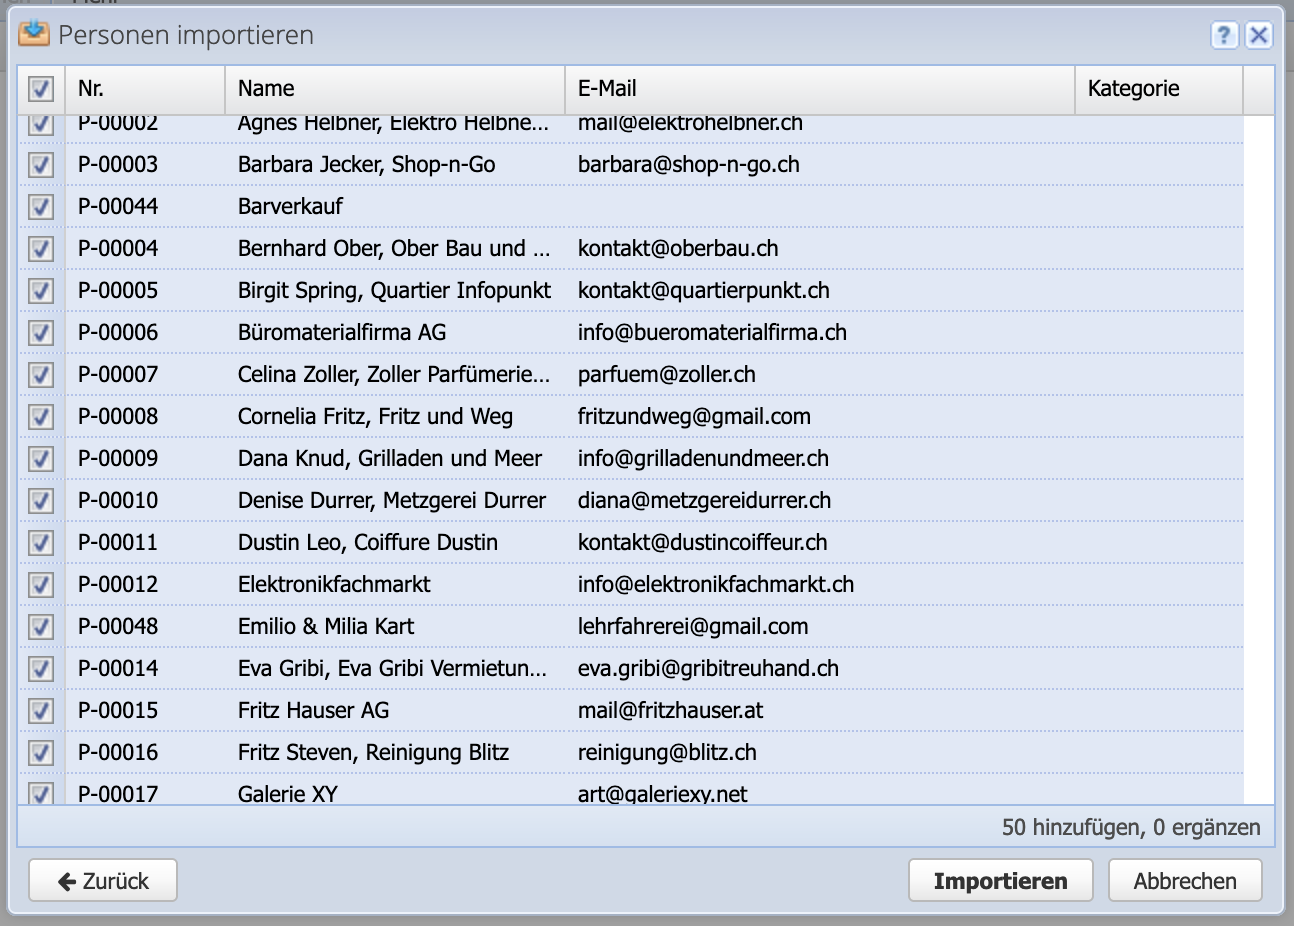
5. Execute import
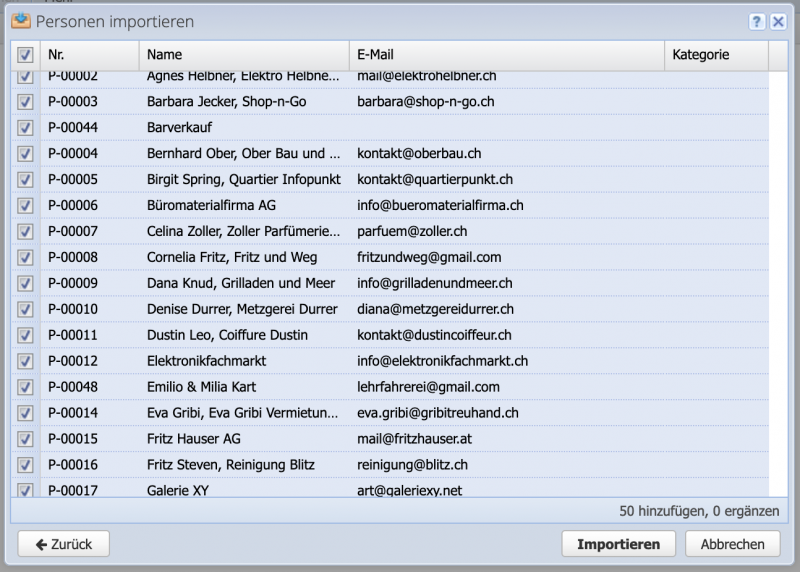
Before the import is executed, CashCtrl shows an overview of the contacts. CashCtrl distinguishes between contacts that are added or updated and shows the number in the bottom right corner. In this import all contacts are new, because it is a new organization that has no entries yet.
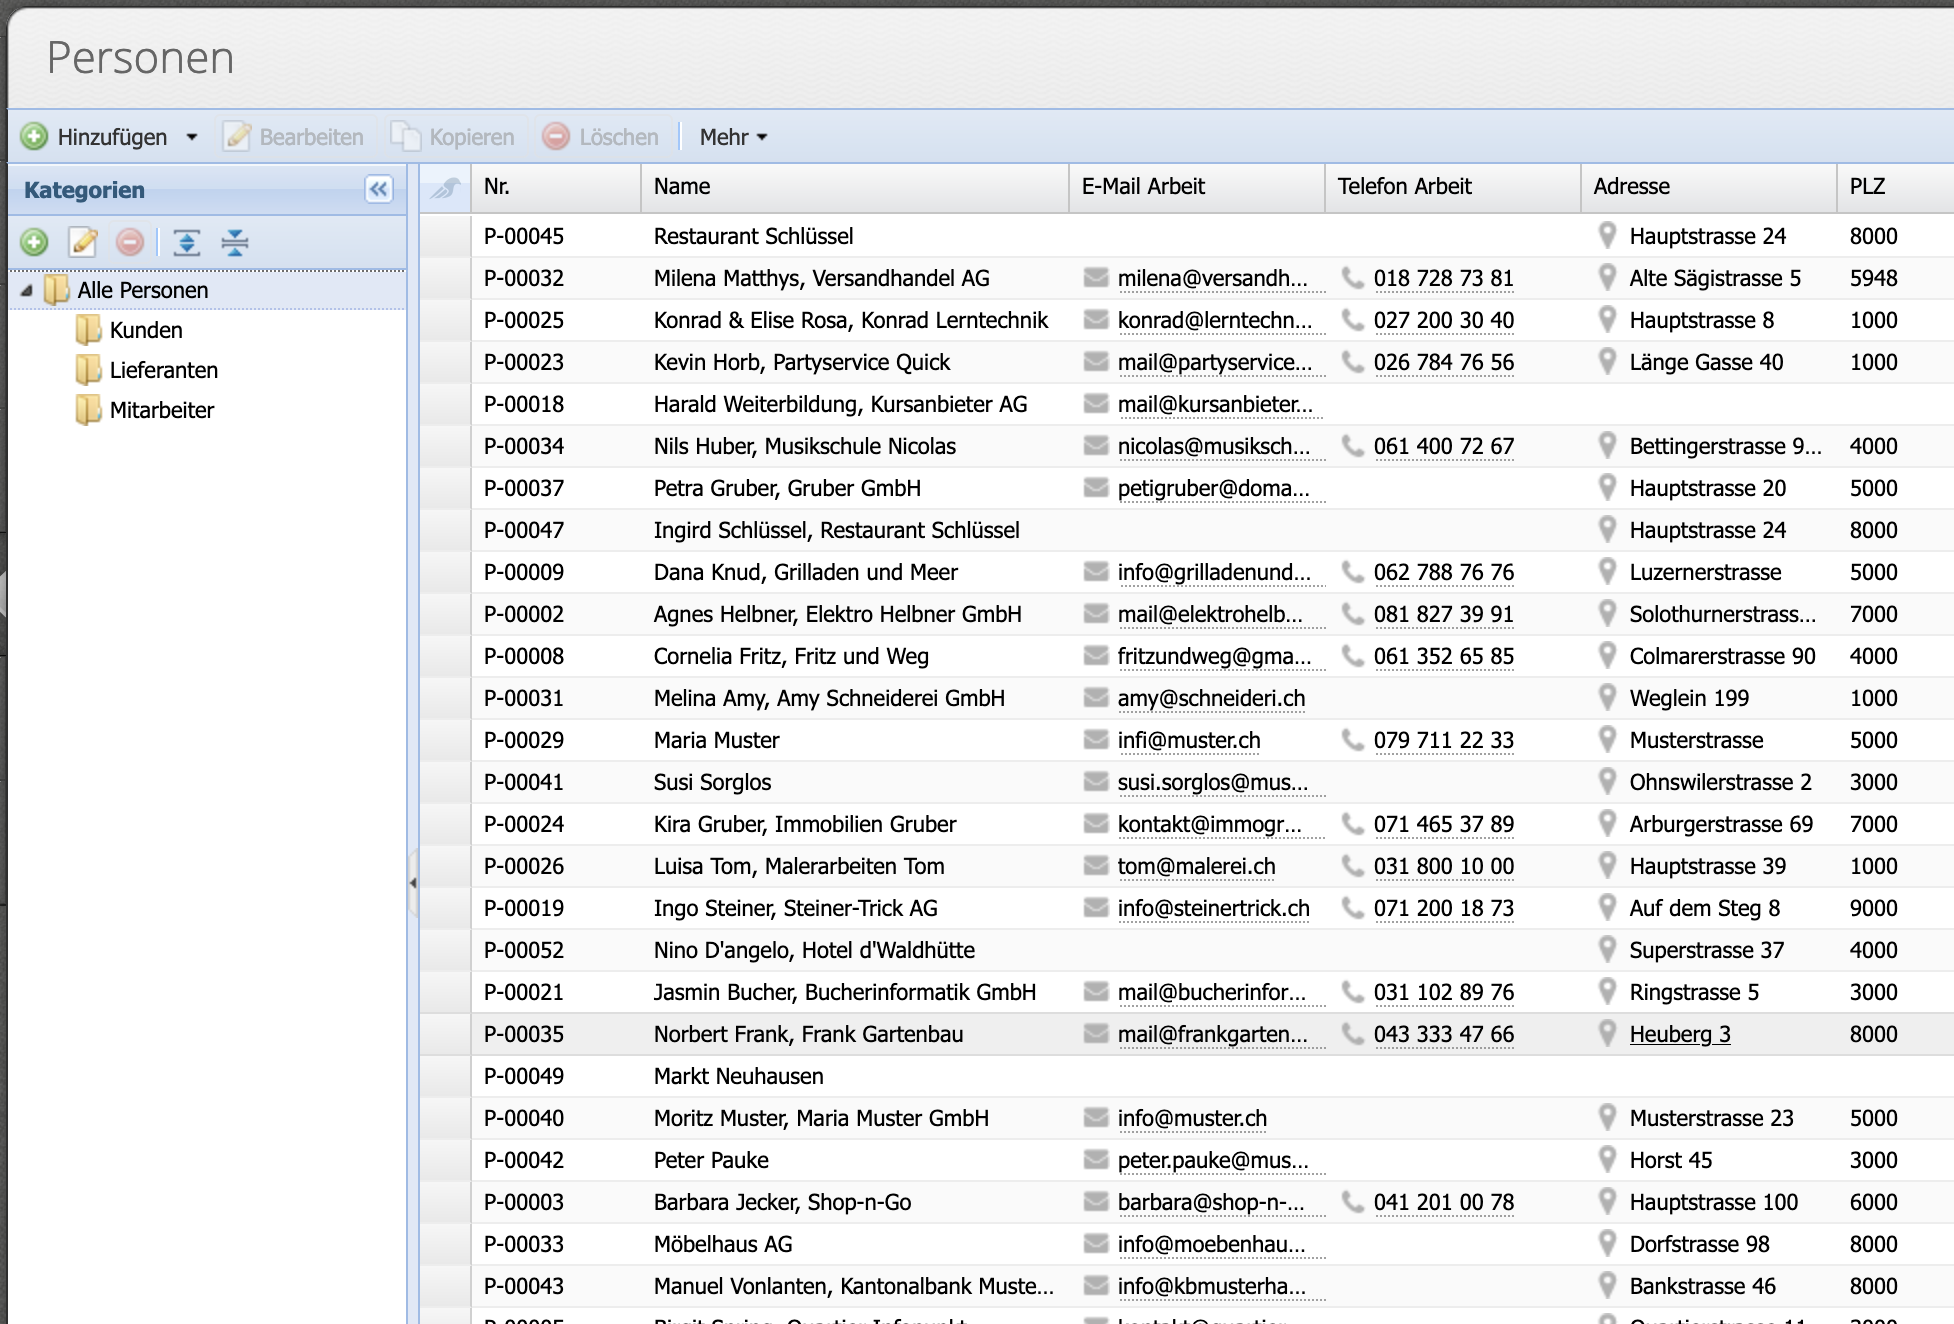
6. Result
The contacts are imported - now you can get started and create the first invoice.
The procedure is identical for importing items into the inventory.
Good to know
-
To find duplicates, CashCtrl compares the fields: Person number, First name, Last name, Email address. If the number and email are missing, duplicates can be detected more quickly because the first and last names are the same.
This function will be revised in the future. As a workaround until then, we recommend to create a column with a number from 1-xx for all entries and to specify this as a person number. This way each entry has its own number and no one is recognized as a duplicate. When importing, the number can be ignored and an own person number can be set by CashCtrl.
