1. Enter company address & logo

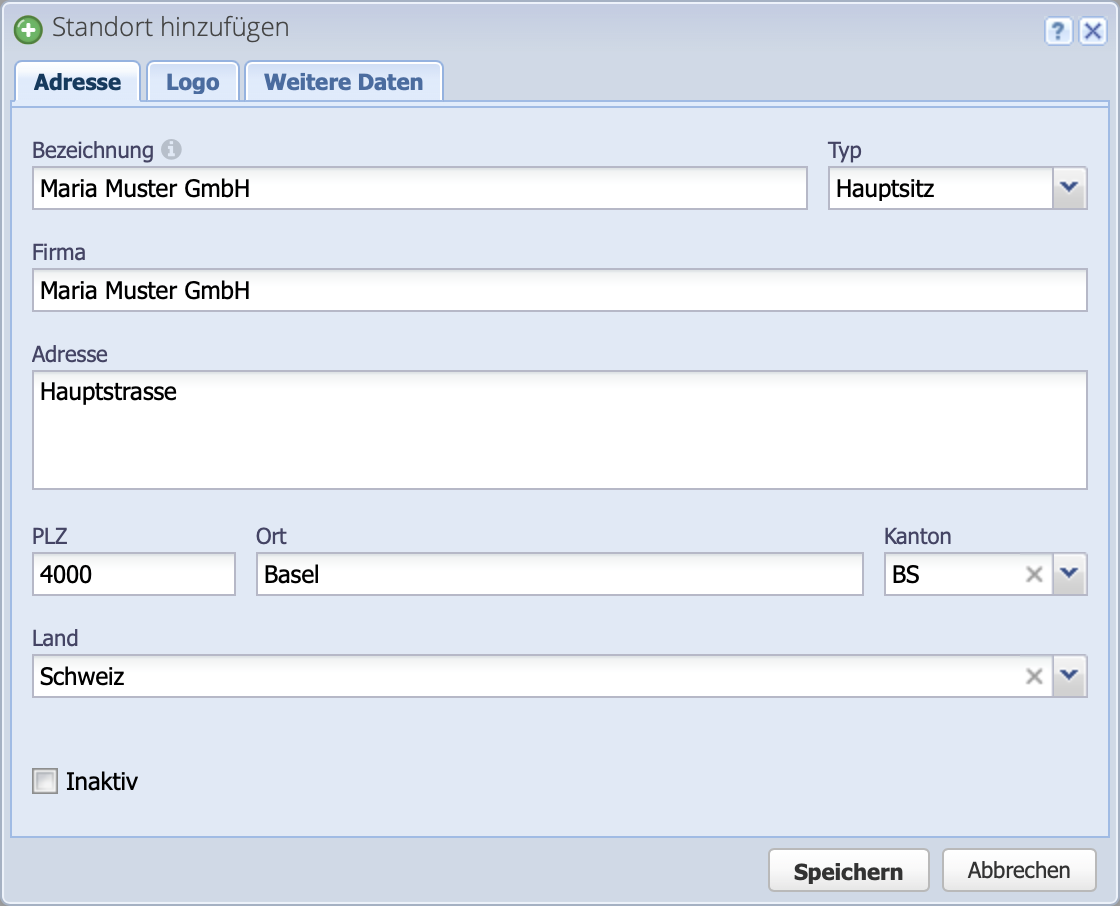
Enter a new location via Add and enter the corresponding address information. Multiple locations are possible, which can be selected as sender for orders.

In the Logo tab, a .jpg or .png file can be selected via file upload. The logo will be displayed on order documents and in reports.

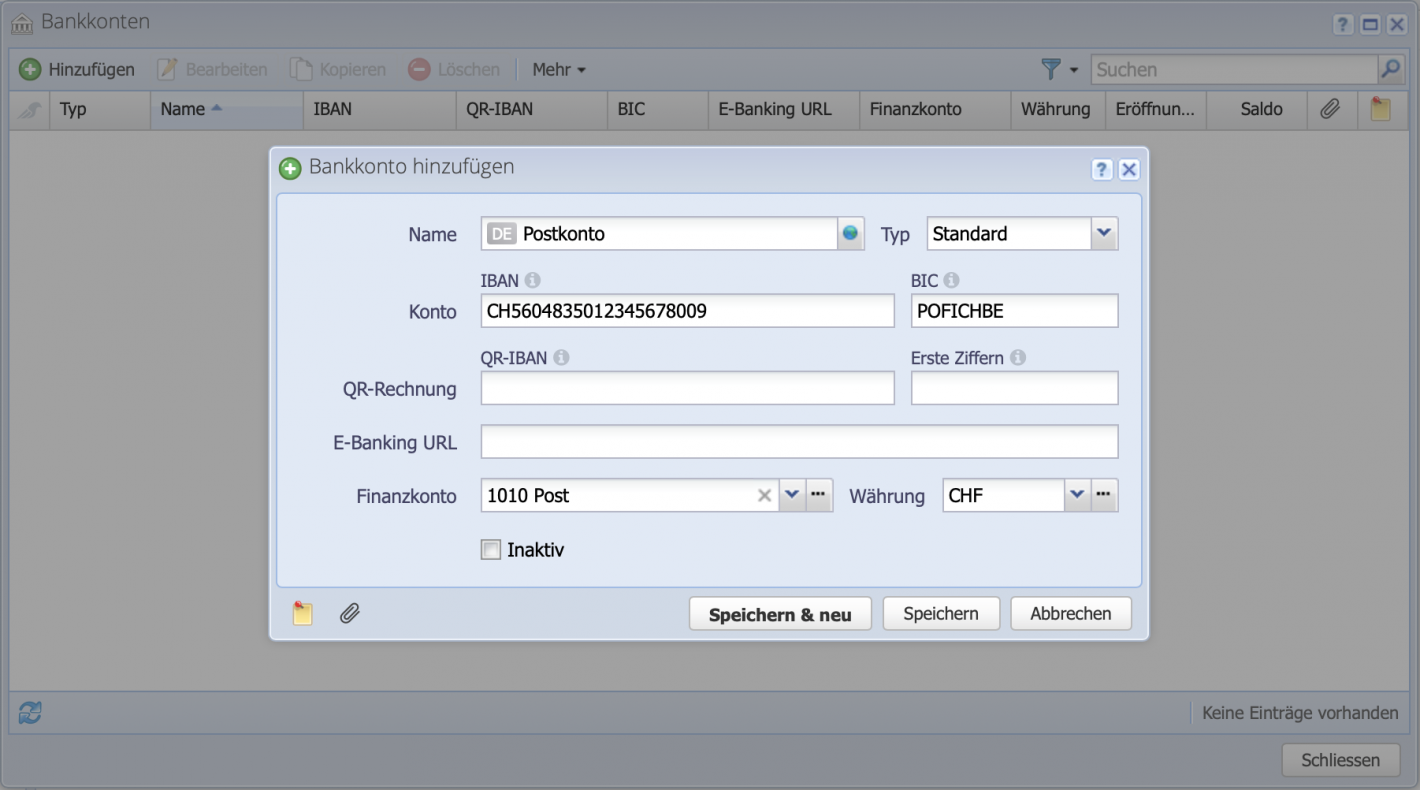
The VAT number as well as the IBAN is specified in the tab UID, bank data.

More info about creating    QR invoices


Screenshot of the locations dialog for entering the address data

2. Select main currency

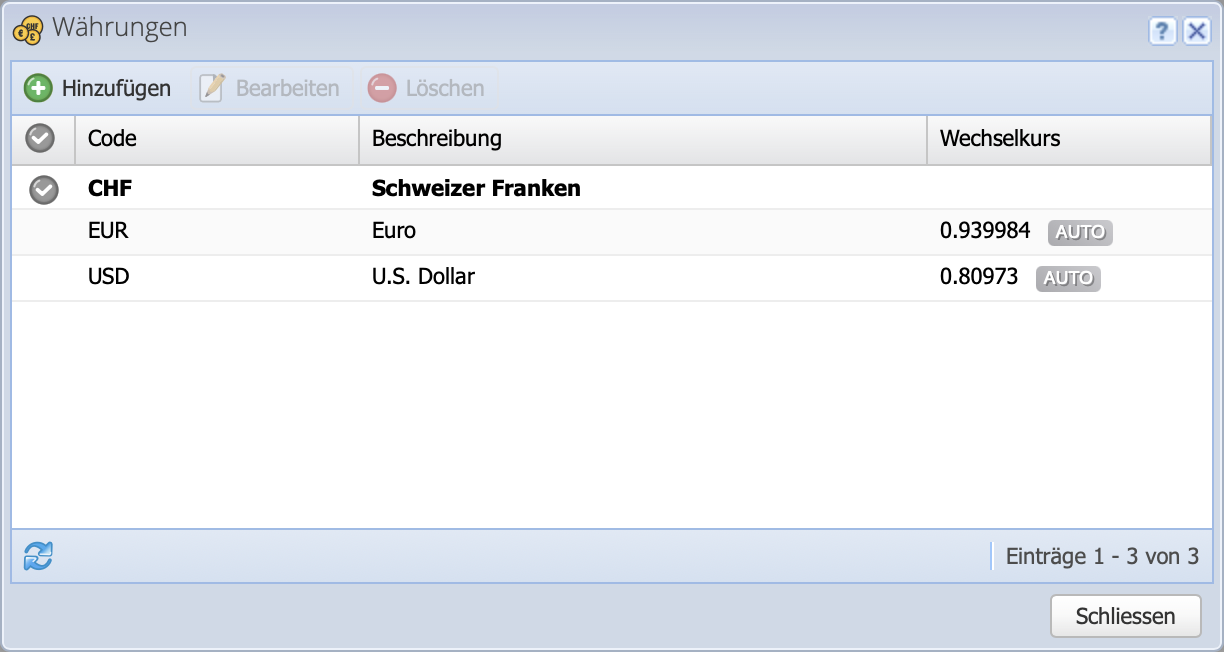
Here you can select the default currency used in CashCtrl. Double-click on the desired currency and check the box Default currency or select and create another one via Add.

Once a foreign currency is used in an entry, the main currency can no longer be changed (foreign currencies is a PRO feature).

Screenshot of the currency settings to set the default currency

3. Define tax rates

If no sales tax is used, this step can be skipped.

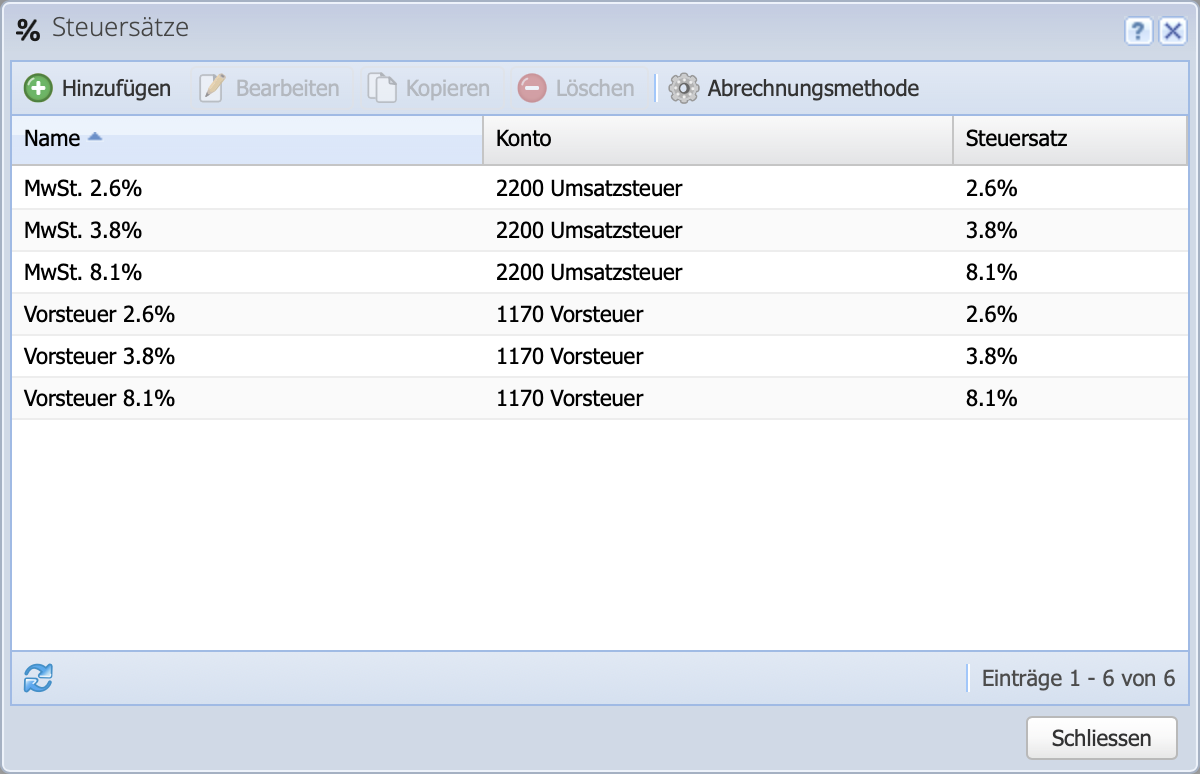
If the company is subject to sales tax, the appropriate tax rates should be entered. A selection is already available. If the VAT changes, a new rate is created and the old one is set to "inactive". This is done by the user and not by CashCtrl.

Once used tax rates can not be deleted or adjusted.

To the VAT Tutorial


Screenshot of the tax rates settings

4. Customize chart of accounts

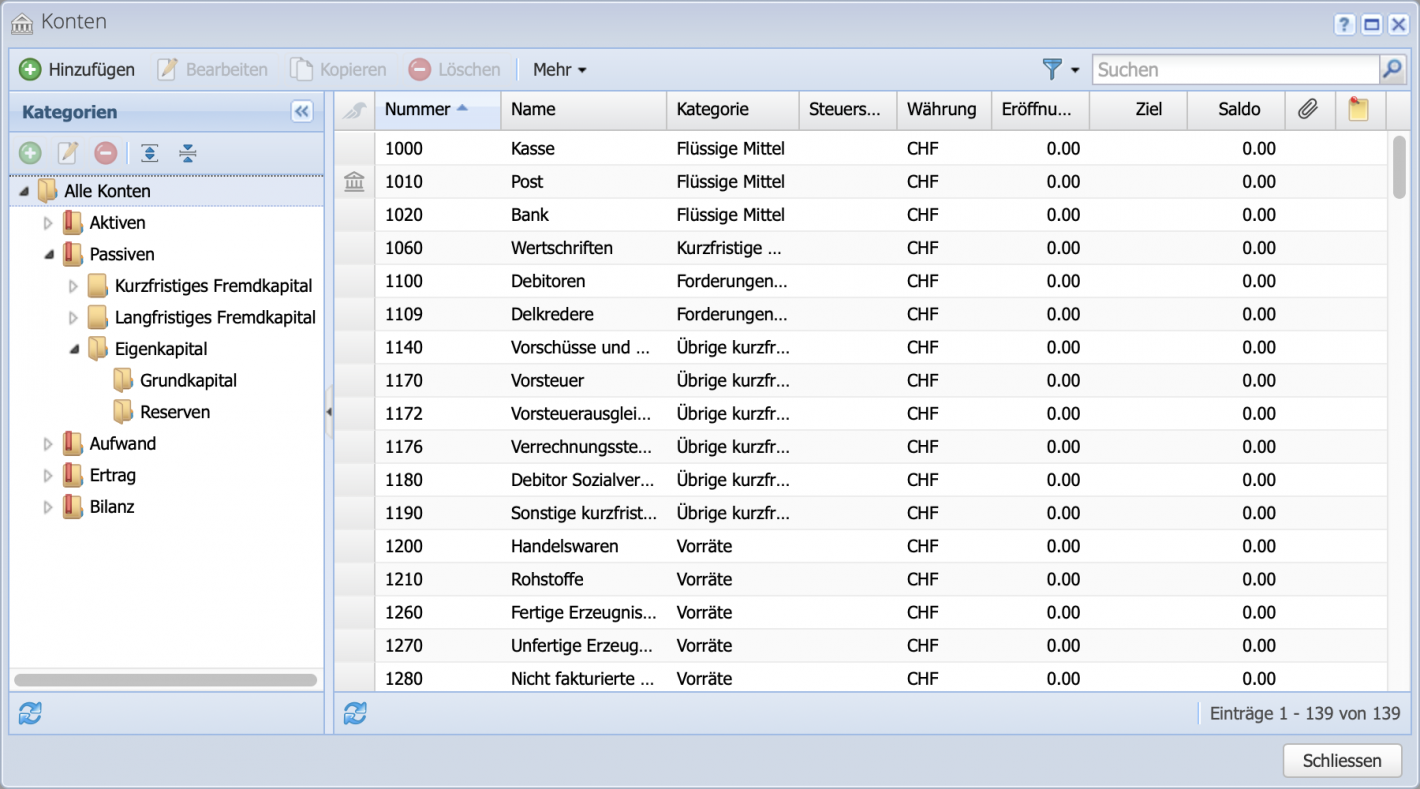
It is important to set up the chart of accounts. This determines which accounts are available for accounting. The generic CashCtrl chart of accounts provides a good basis that is sufficient for most purposes. If needed, this can be customized.

Accounts can be added at any time.

To the chart of accounts tutorial


Screenshot of the accounts module with tabular chart of accounts

5. Create opening entries

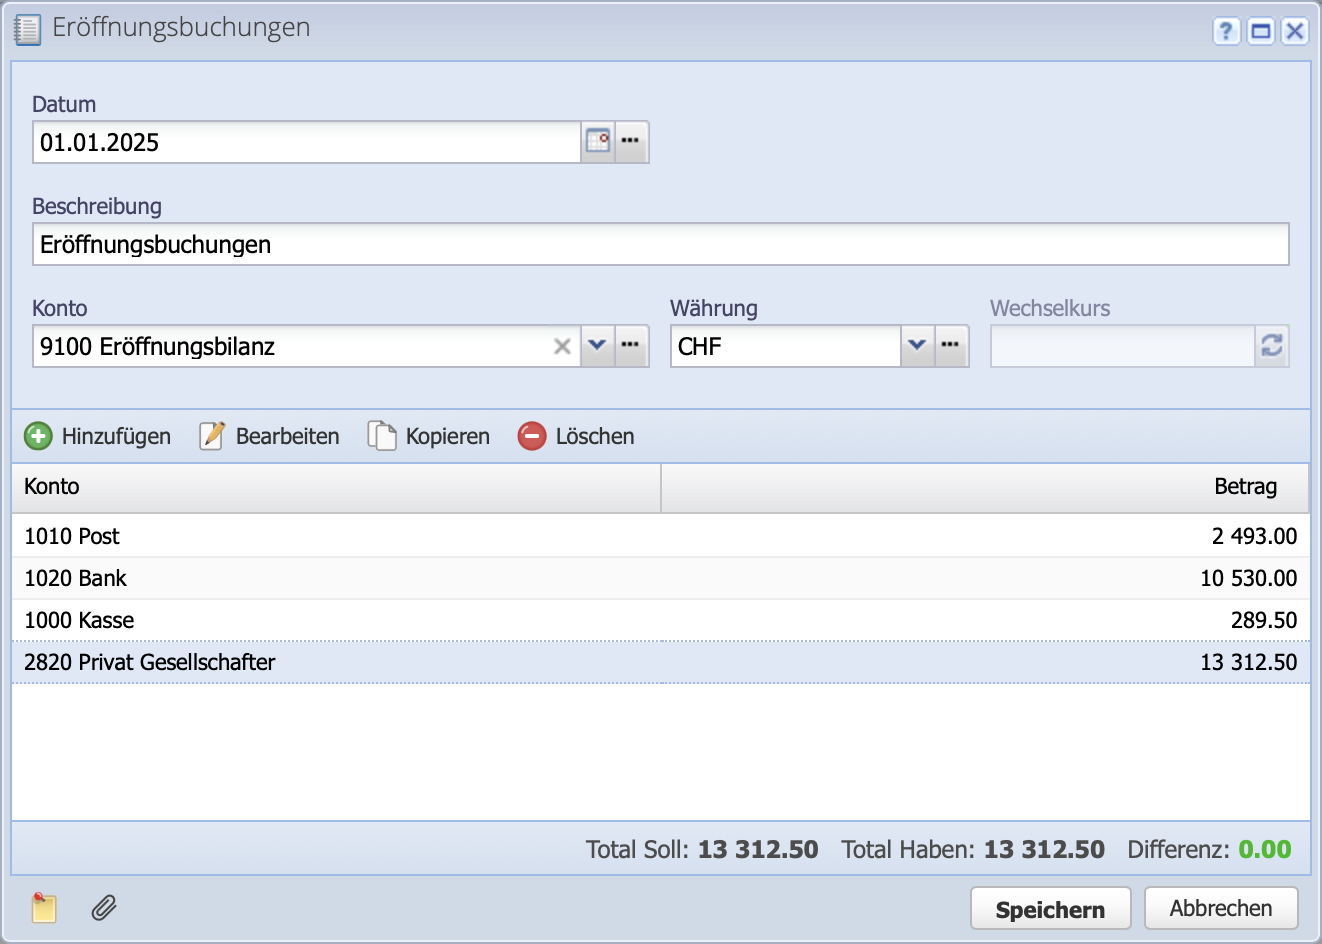
In the opening entries dialog the opening balances are entered. Debit and credit must be balanced, this is visible at the bottom right and is the case when Difference: 0.00 is displayed in green.

All entries must be in the same currency. For a further currency, the dialog can be called up again and further opening entries can be entered in a foreign currency.

The dialog can be reached via Accounts More Opening entries or in the Journal in the Add dropdown . To do this, the first accounting period must be selected, as the opening entries must fall within that period.

Good to know: Opening entries are only required once. The transfers in subsequent years are made automatically by CashCtrl.

Go to opening entries tutorial


Screenshot of the opening bookings dialog

6. Choose settlement method (agreed/received)

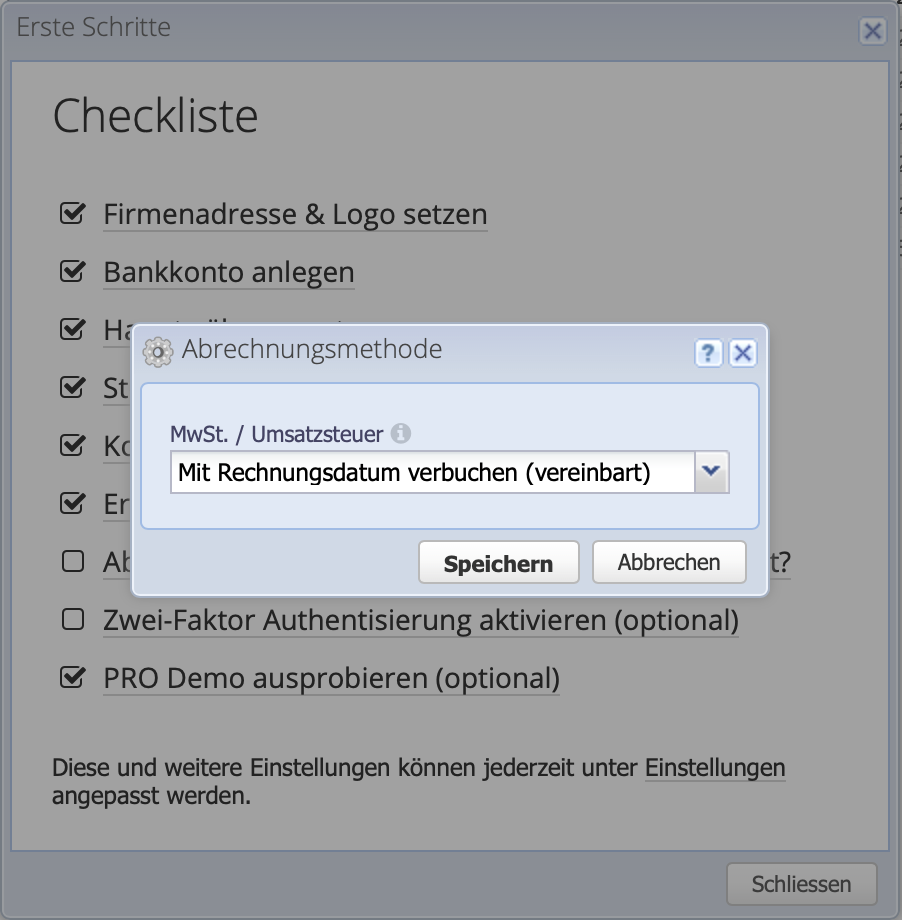
If sales tax is applied, it can be defined here whether the sales tax is to be accounted for according to the received (book VAT with payment date) or agreed payment method (book VAT with invoice date). The default setting is Agreed.

Please note:

  • A later change of the accounting method has no influence on entries already made.
  • If no tax rate is selected for manual entries or no tax rates are defined for revenue accounts, no VAT will be charged. If the company is not taxable, this does not need to be deactivated separately.
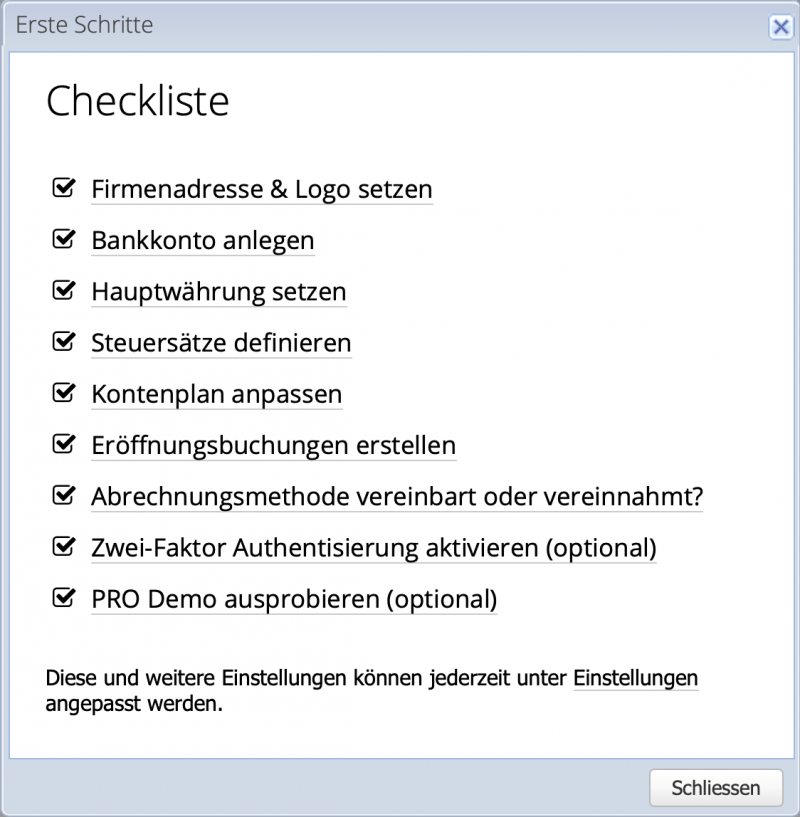
Screenshot of the Getting Started Checklist

7. Activate two-factor authentication

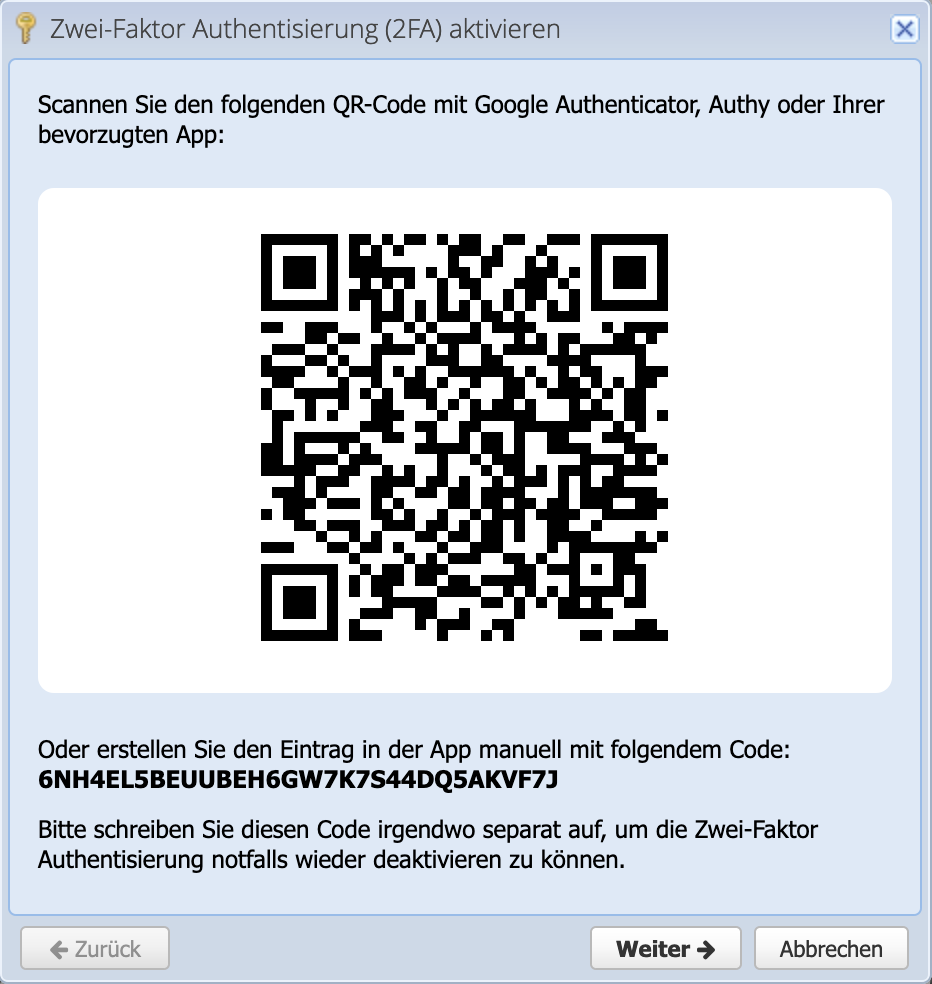
In addition to the password, a numeric key from an app is required to log in. We recommend Authy or Google Authenticator as an app. Simply download one of the apps from the Appstore or Google Play and scan the QR code generated by CashCtrl once.

Be sure to note the long code for possible recovery. In case of cell phone change or loss, the 2-FA can be restored this way.

The app generates a 6-digit token valid for a limited period of time, which is entered in the second step when logging in.

Go to 2FA tutorial

Screenshot of two-factor authentication setup

8. Try PRO demo (optional)

Test the PRO features free of charge and without obligation for 30 days. Before the end of the 30 days, the invoice will be sent by email without any commitment. This can be ignored if you do not want to continue with PRO. You can easily switch back to FREE (click downgrade to FREE).

No subscription trap, no hook :-)

Click here for the overview of PRO functions


CashCtrl PRO Falcon

9. Submit a support request

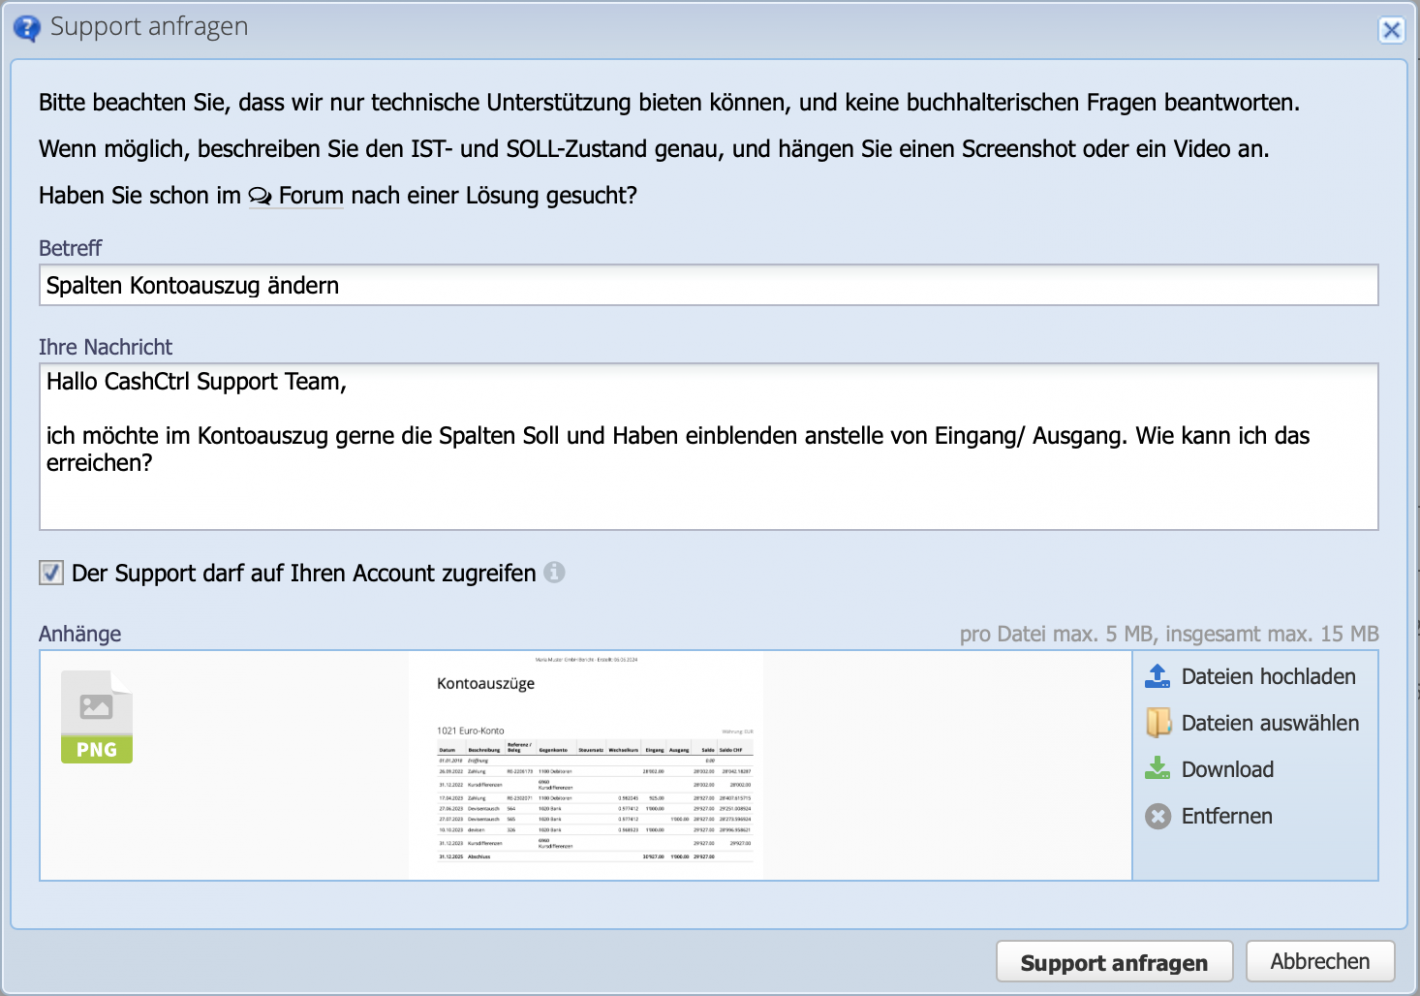
If our tutorials and the forum do not help, you can submit a new request to CashCtrl Support via Settings Support request.

In the dialog, it is best to describe the question with the actual and target status and attach a screenshot or screencast. Optionally, check the box Support may access your account so that we can better understand the question in your own account in case of doubt.

Click on Request support to send the message and look forward to our reply.

Screenshot of a support request